Runout is a very effective geometric tolerance which can be applied on any rotationally symmetrical parts. Depending on functional requirements, RunOut tolerance can be either measured on each individual point distributed arbitrary along the tolerated circular element which in this case is specifies as Circular RunOut tolerance. Or can be measured over the entire surface... Continue Reading →
MECHANICAL DESIGN ENGINEERING – Geometrical Dimensioning and Tolerancing_What is the CIRCULAR RUNOUT tolerance?
Runout is one of the oldest and simplest concepts used in GD & T. Maybe as a child you stood your bicycle upside down on the ground and spun a wheel. If you fixed your stare on the shiny rim where it passed a certain part of the frame, you could see the rim wobble... Continue Reading →
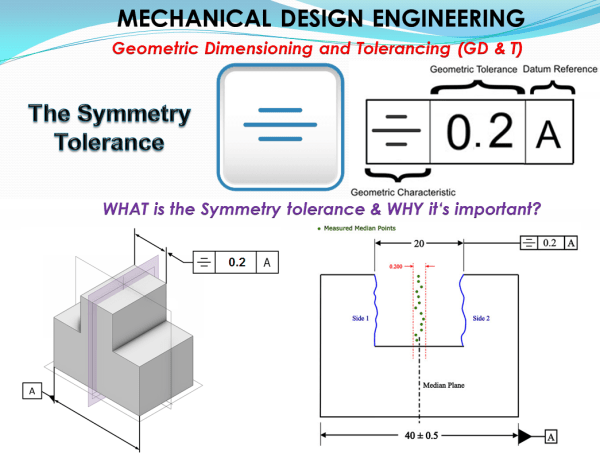
MECHANICAL DESIGN ENGINEERING – Geometrical Dimensioning and Tolerancing_What is the SYMMETRY tolerance?
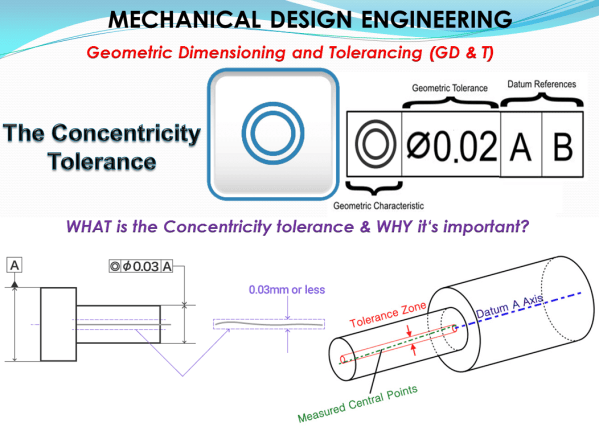
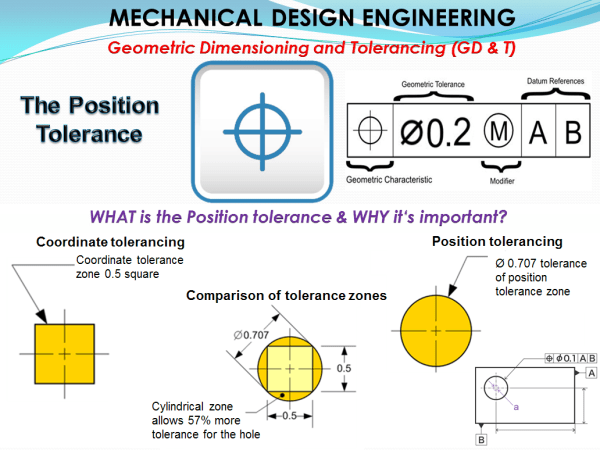
Among the 14 used GD & T symbols in the category of Location Tolerances there are 3 types. 1. The Position Tolerance 2. The Concentricity Tolerance 3. The Symmetry Tolerance From these 3 tolerance types, only the Position Tolerance is often used as it is also easy to measure. The other 2 are in general... Continue Reading →
MECHANICAL DESIGN ENGINEERING – Geometrical Dimensioning and Tolerancing_What is the CONCENTRICITY tolerance?
The functionality of a part in an assembly is usually well defined by the 4 form tolerances (straigthness, flatness, circularity and cylindricity) and among the orientation tolerances by the 3 most frequent ones: the position, the perpendicularity and the parallelism tolerance. Yet we have 14 different types of tolerances in total, which can be anytime... Continue Reading →
MECHANICAL DESIGN ENGINEERING – Geometrical Dimensioning and Tolerancing_What is the POSITION tolerance?
Location tolerances determine the nominal location or ideal location of a feature relative to one or more references. This results in 3 types: Position: the nominal location is determined by theoretical dimensions Coaxiality/Concentricity :The nominal location is the axis or the center of the reference element Symmetry: The nominal location is the median plane or... Continue Reading →
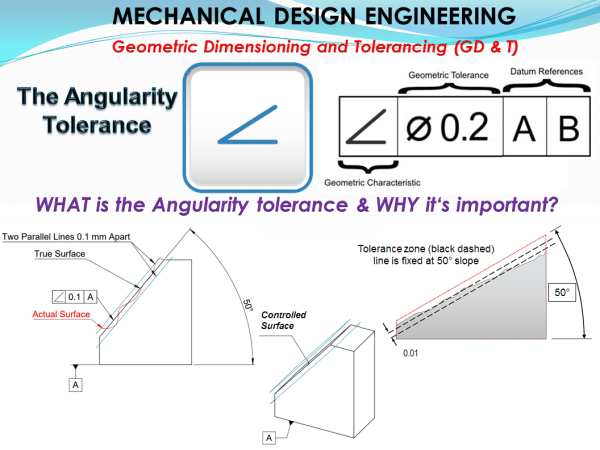
MECHANICAL DESIGN ENGINEERING – Geometrical Dimensioning and Tolerancing_What is the ANGULARITY tolerance?
Objects made as an assembly of more than 1 component, in order to be functional besides a clearly specified form each component, must have at least 1 clearly specified orientation (parallel, perpendicular or angular). For the parallelism and perpendicularity the orientation is quite simple to understand , it is either at 0° or at 90°,... Continue Reading →
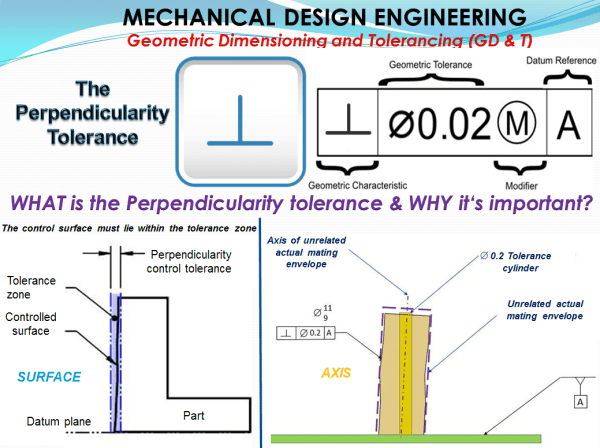
MECHANICAL DESIGN ENGINEERING – Geometrical Dimensioning and Tolerancing_What is the PERPENDICULARITY tolerance?
In a mechanical design of an assembly made up of various parts it is often the case to make sure the functional elements are perpendicular to a reference. In GD & T this is called Perpendicularity Tolerance. Like parallelism, the perpendicularity tolerance is also an Orientation tolerance from the sub-group of Direction tolerances. Therefore for... Continue Reading →
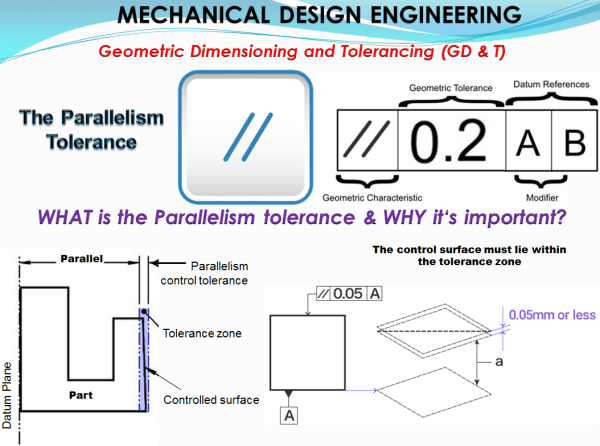
MECHANICAL DESIGN ENGINEERING – Geometrical Dimensioning and Tolerancing_What is the PARALLELISM tolerance?
When you create a part as CAD data sure you can create a beautiful animation and virtually your part is perfect. But if you also intend to produce it, then without using GD & T for functional geometrical elements your CAD work remain only a virtual concept of something. It won´t work for real. Therefore... Continue Reading →
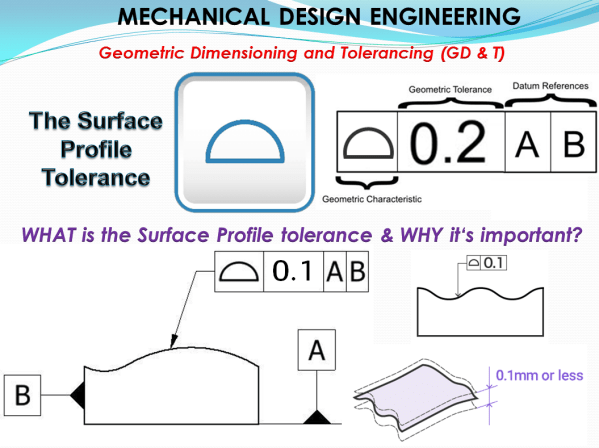
MECHANICAL DESIGN ENGINEERING – Geometrical Dimensioning and Tolerancing_What is the SURFACE PROFILE tolerance?
For quite a long time mechanical parts were controled based on their regular forms such as planar form, cylindrical form or spherical form, but when parts become more complex in form such measurements based on simple features were not possible anymore. Such irregularly shaped profiled features couldn’t be geometrically controlled until 1966 when the first... Continue Reading →
MECHANICAL DESIGN ENGINEERING – Geometrical Dimensioning and Tolerancing_What is the LINE PROFILE tolerance?
The mechanical description of a part is usually done by using simple geometrical form features such as lines, planes, circles or cylinders. But in many cases mechanical parts have complex geometrical structures and their form deviations must be described more specifically. Therefore when your product is getting complex in form (e.g. automobiles, airplanes, ships) with... Continue Reading →


