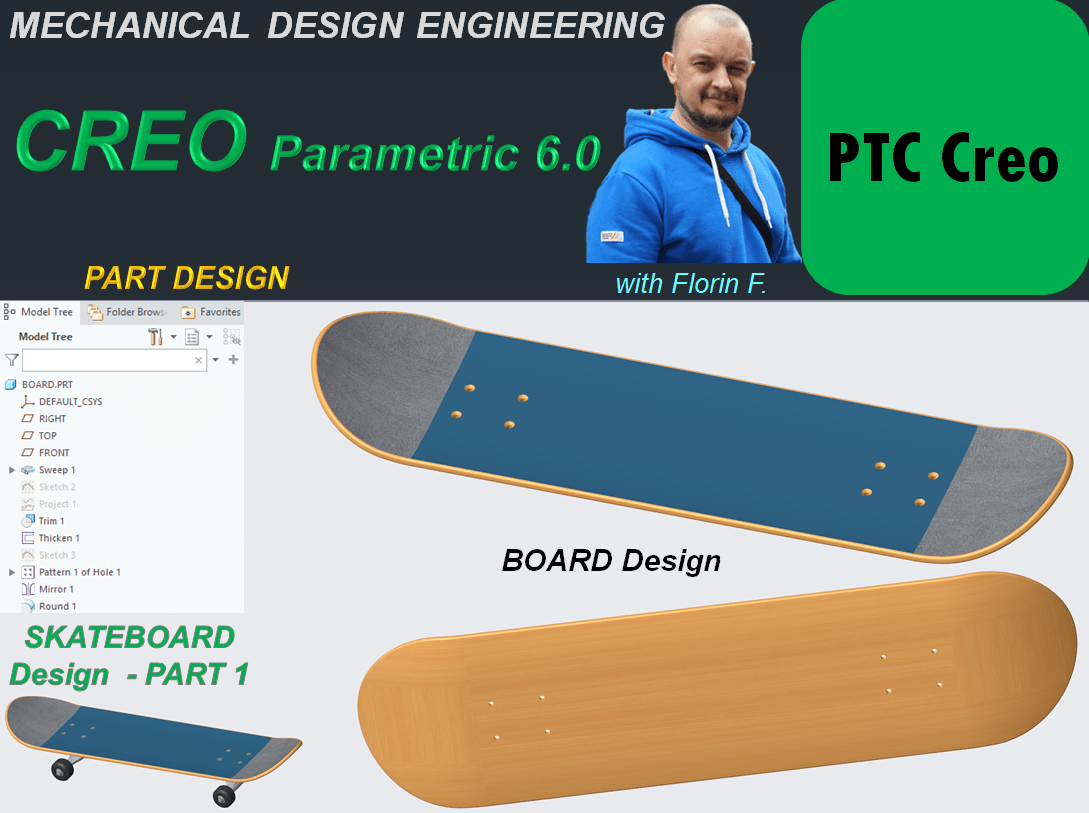
This is Part 1 of the design work for Skatebord product. As usual I start this work by designing each component and later I will generate the final product assembly. The first component is the BOARD.
STEP 1.
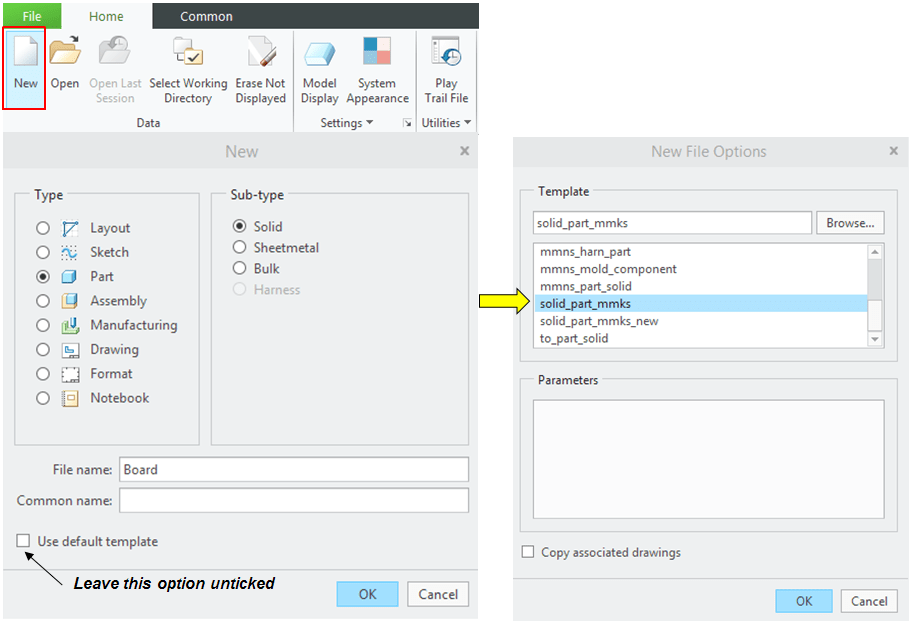
Create a new part and rename it “Board”
STEP 2.
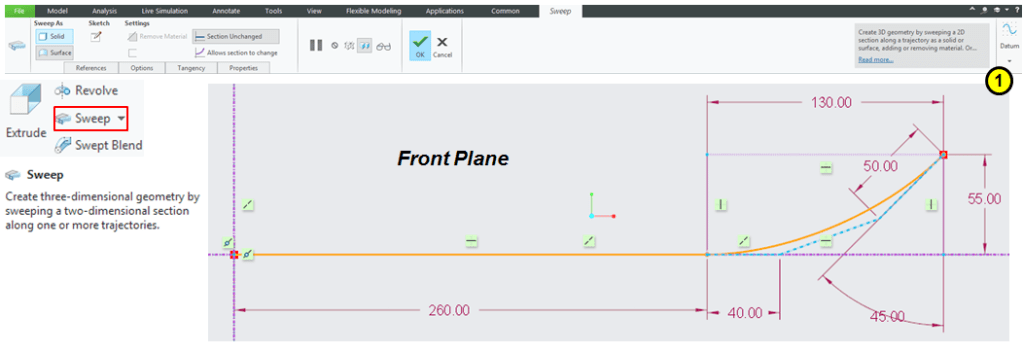
In Model Workbench click on Sweep icon and on the far right click on Datum Icon and create the following sketch on the Front plane.
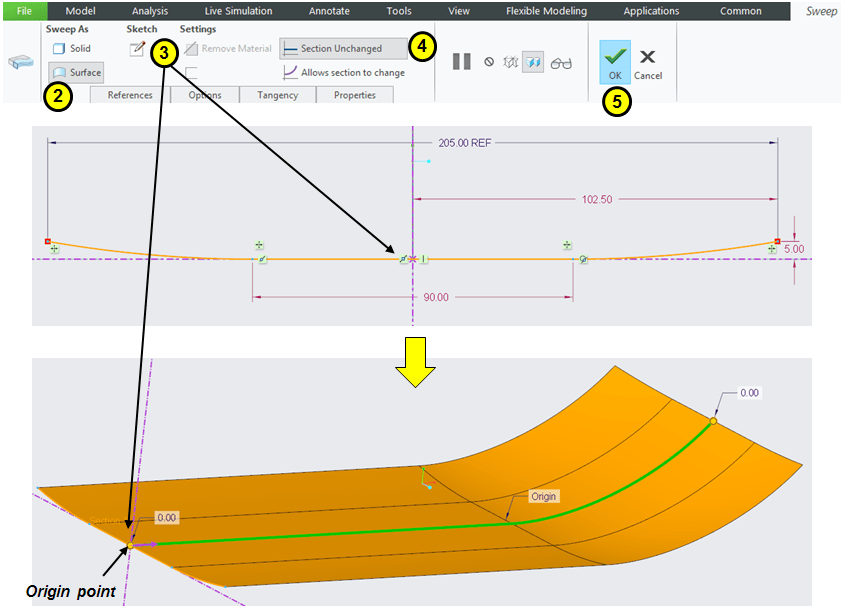
Then select the option to Sweep As Surface, and click on Sketch icon to create the 2nd profile which will be swept along the 1st one. Make sure the Origin Point has the correct position (it must have a purple arrow attached)
STEP 3.
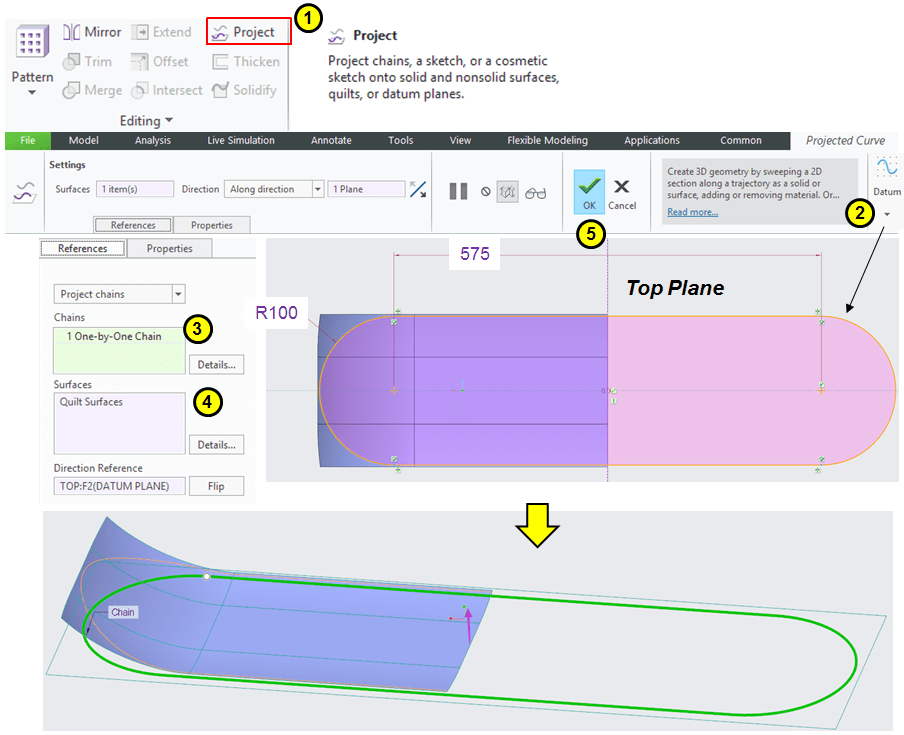
The Board is simmetical so it’s much easier to work on half side and when all the elements are in place you can mirror everything. For now contunu to create features and the next one is a wireframe projection on the swept profile. In Model Workbench click on Project icon and on Top Plane sketch an Oblong or as Creo name it Racetrack (in Palete option from Sketching tools) having a radius on 100mm and length bewetween central side points of 575mm and project this sketch on the surface as shown:
STEP 4.
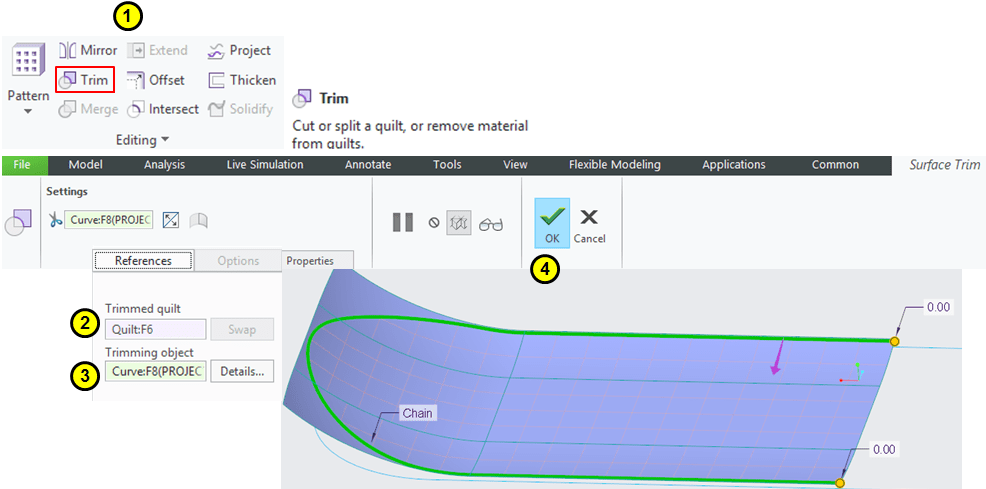
Trim the surface with the projected wireframe.
STEP 5.
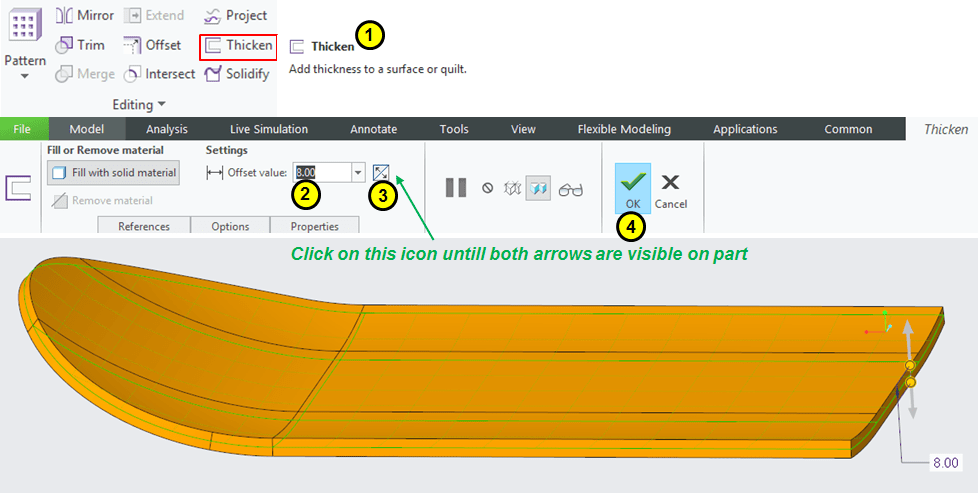
Add a thinckness of 8mm on the trimmed surface as mid-surface.
STEP 6.
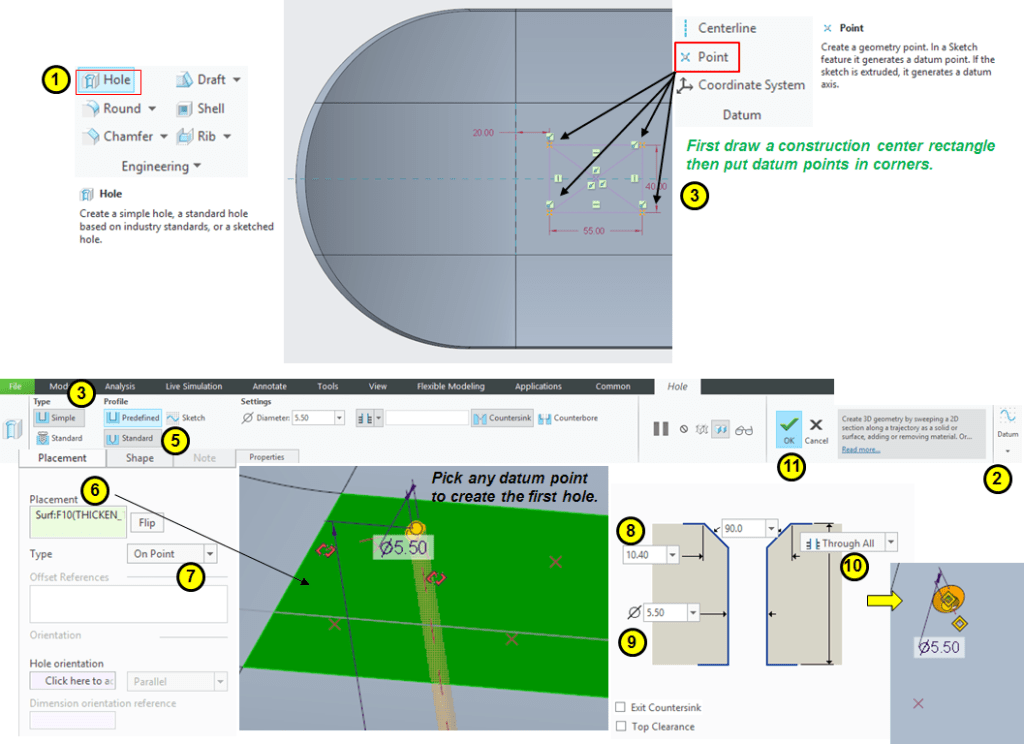
Create the fixation holes on the flat area with the following characteristics:
STEP 7.
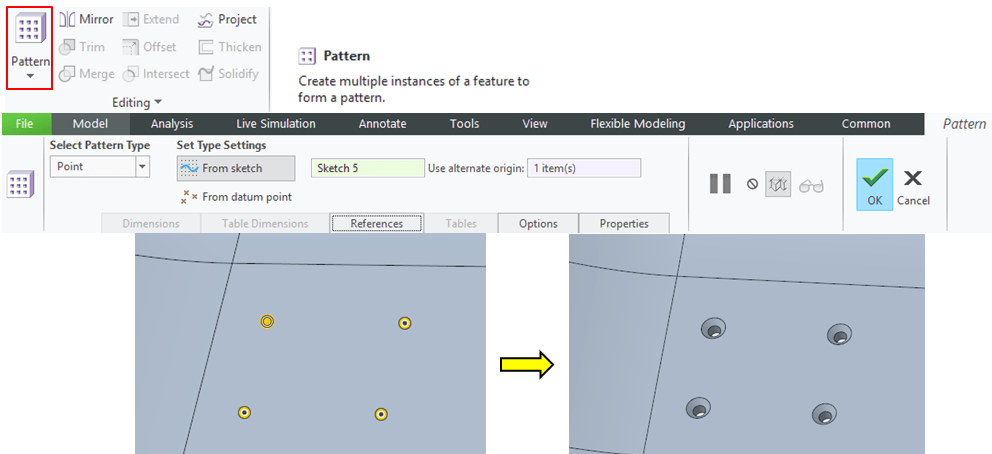
Pattern the hole on each datum point.
STEP 8.
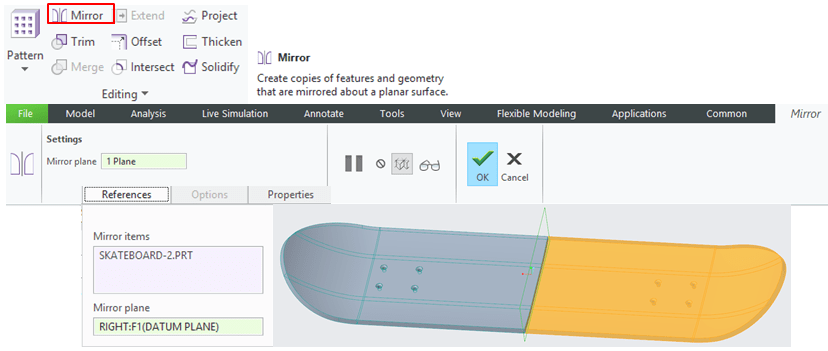
Mirror everything with the Right Plane
STEP 9.
Add Rounds on the edges

STEP 10.
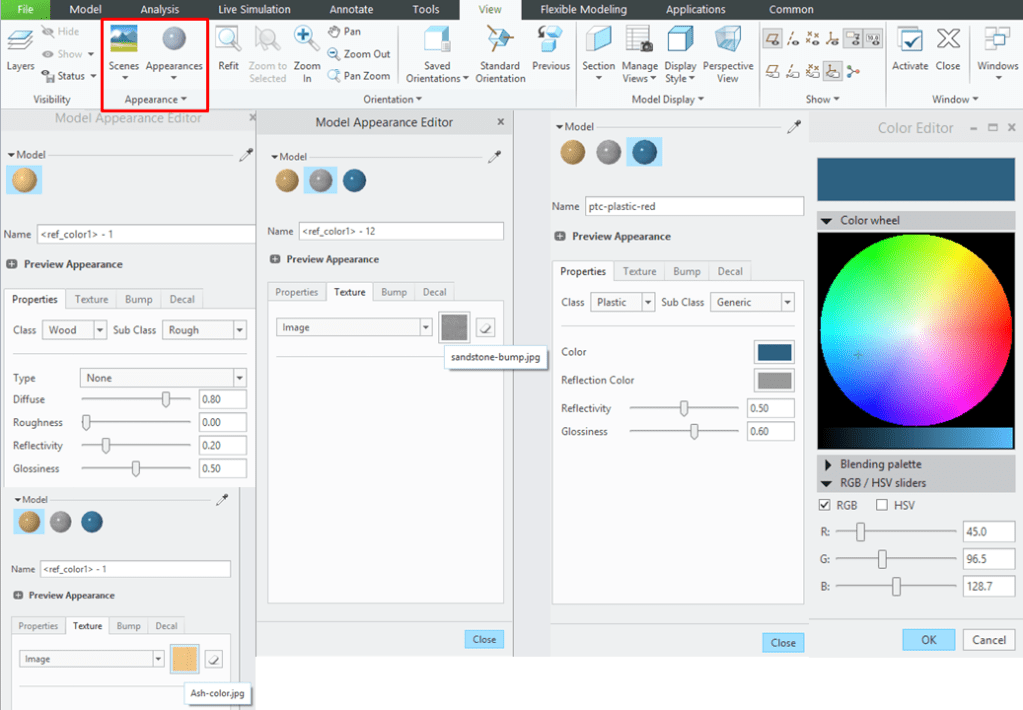
Apply appearaces to make the final design look more attractive. Switch to View workbench and for example apply the following colors:
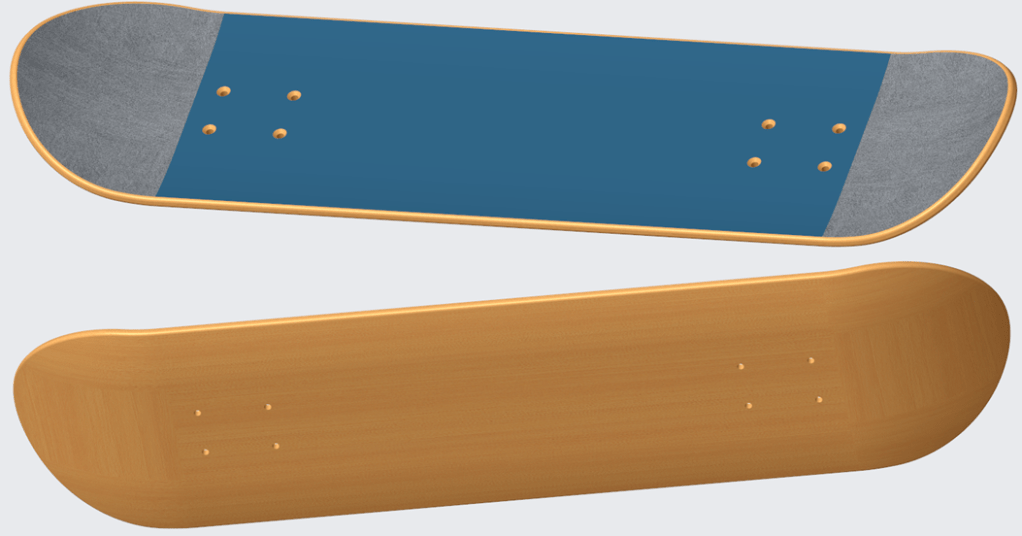
Final part looks like this:
This design work is also available as video version on my YouTube channel embedded below:

Leave a comment