
Let’s design a Pirate Ship Wheel
STEP 1.
Create a new CAD file
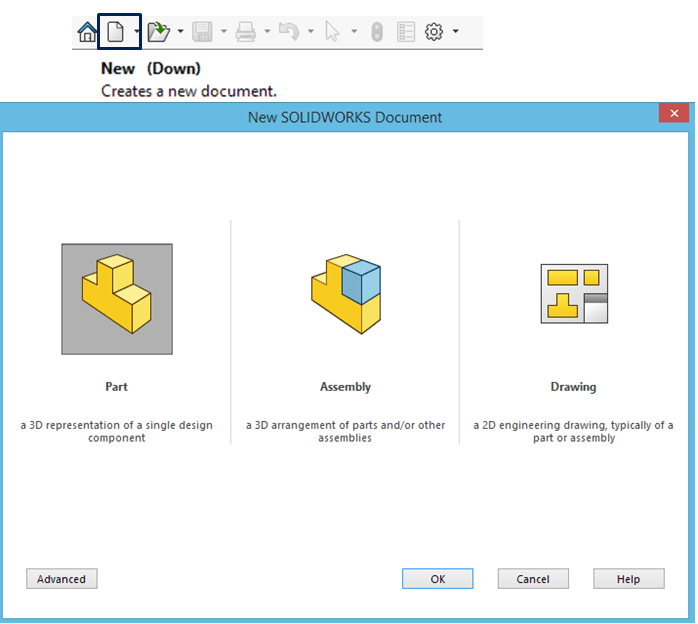
STEP 2.
On Right Plane, sketch the 2 profiles for outer and inner wheel at a distance from each other of 360mm as shown:
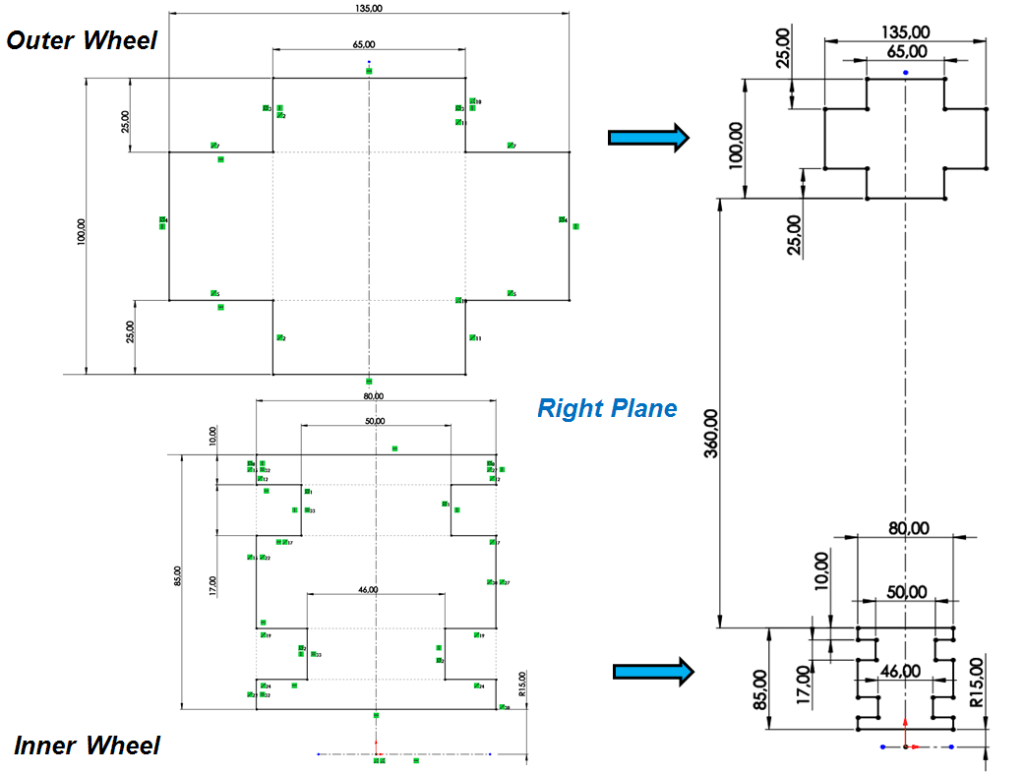
STEP 3.
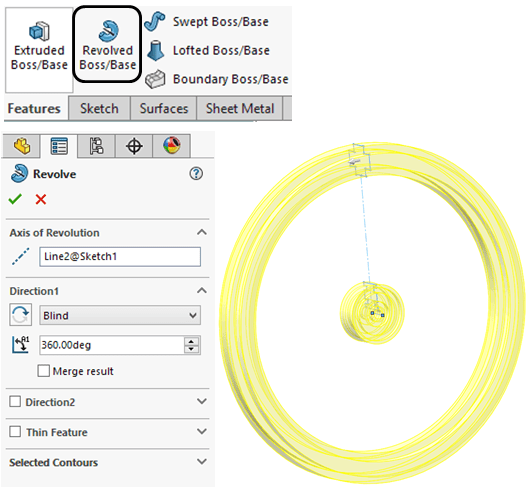
In the Features toolbar, click on Revolved Boss/Base icon and revole everithing completelly.
STEP 4.
On Front Plane sketch and define 5 points which will be used to in the constuction of Wheel Handles.
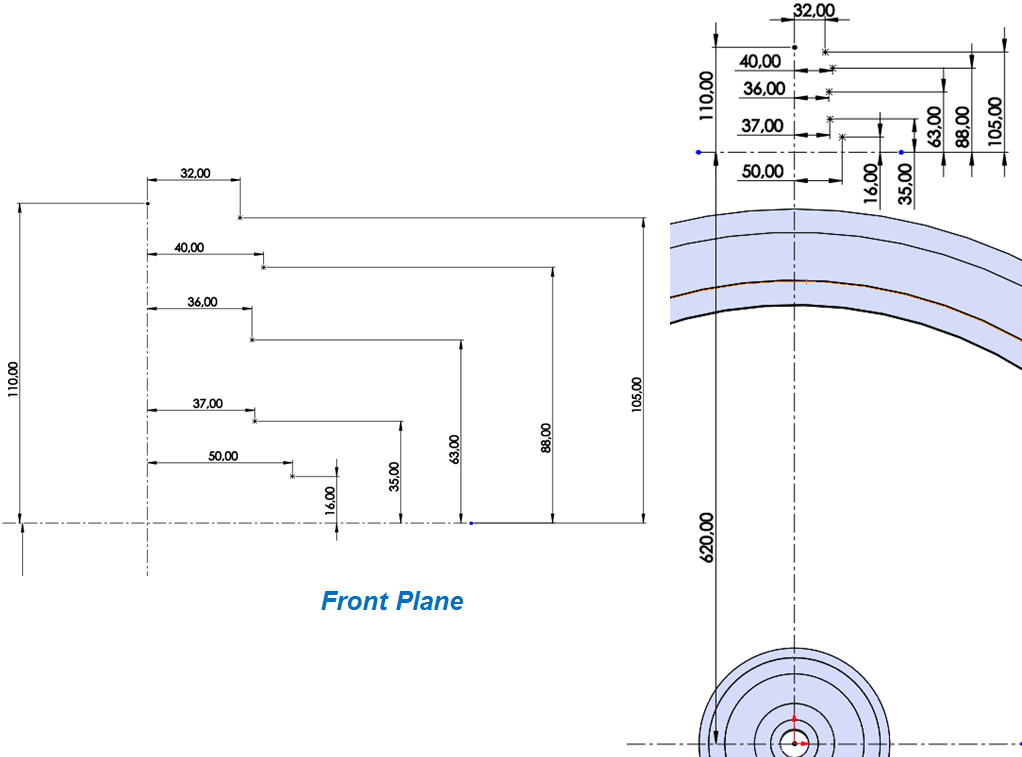
STEP 5.
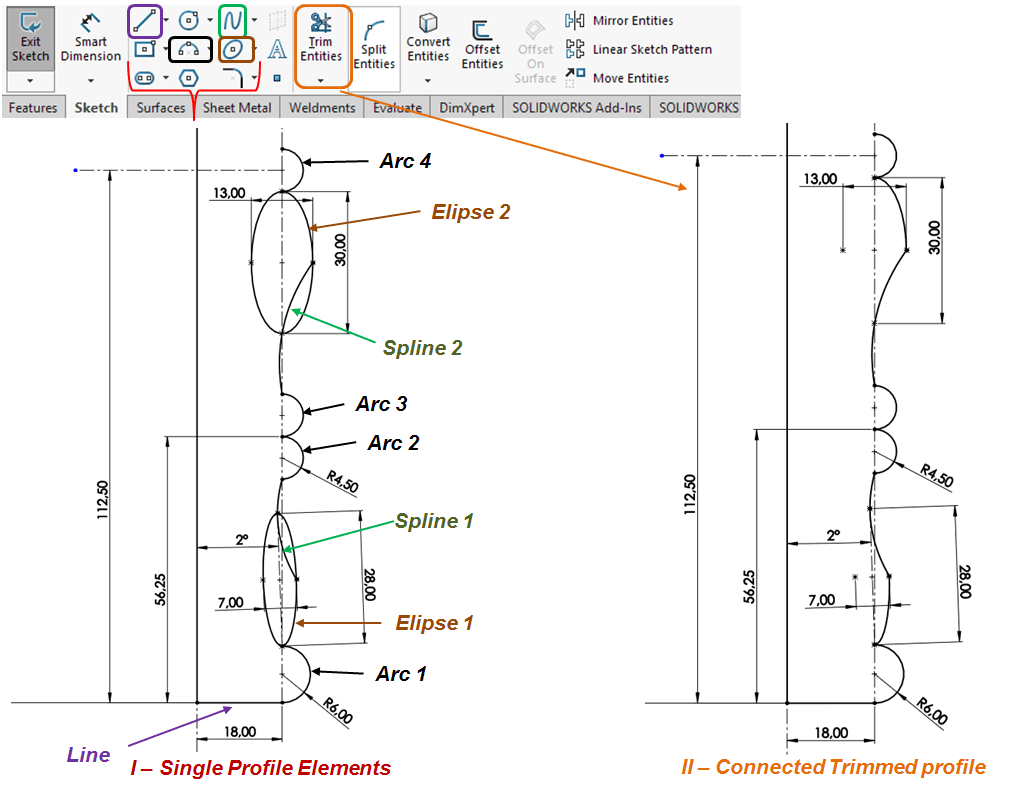
On the Front plane, draw and define 2 sketches for handle and spoke as shown:

For Handle connect the points defined at STEP 4 and for the Spoke create the profile at a distance of 170mm from the wheel by drawing the bottom-half using line, arc, elipse and spline features, put the geometric constrains and dimensions and except the middle arc, mirror everything on the horizontal middle line as shown:
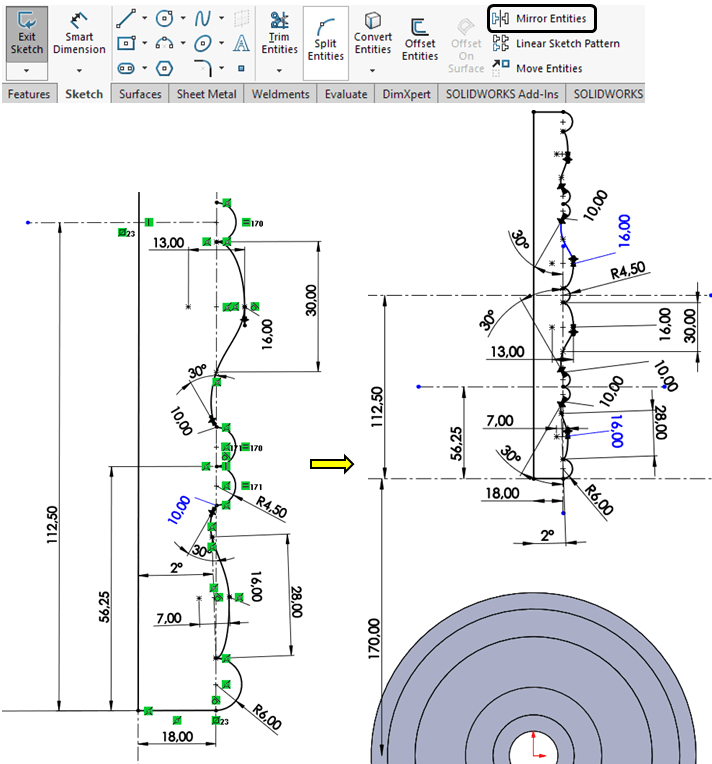
It may happen that the mirror result will generate some overconstrains but in this case delete the feature which has a problem and redo it manually (see the emmbeded video below).
STEP 6.
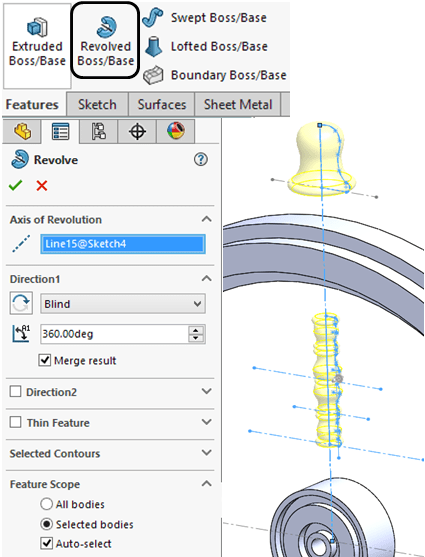
Click on Revolved Boss/Base icon and revolve the previous sketch as shown
STEP 7.
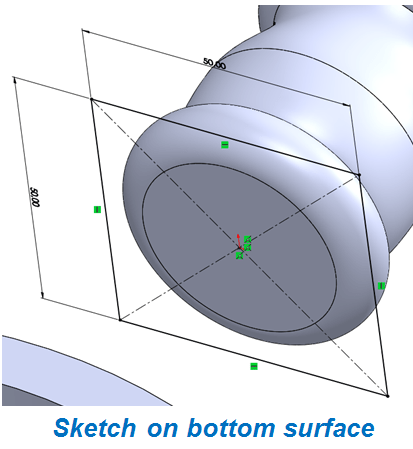
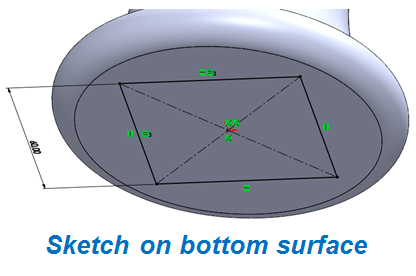
On the bottom side of the Spoke, sketch a square of 50mm
STEP 8.
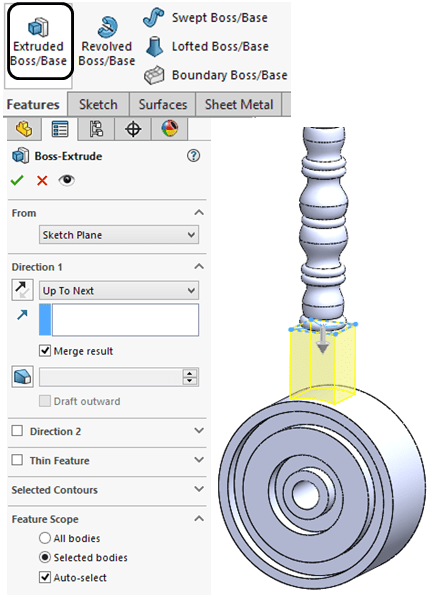
In Features toolbar click on Extruded Boss/Base and extrude the previous sketch Up to Next surface (the inner wheel)
STEP 9.

On the top surface of spoke convert the same sketch from the bottom.
STEP 10.
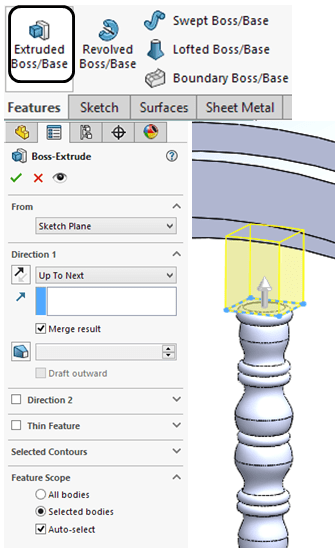
Extrude the preious sketch Up to Next (the Outer wheel).
STEP 11.
On the handle’s bottom surface sketch a square of 60mm;
STEP 12.
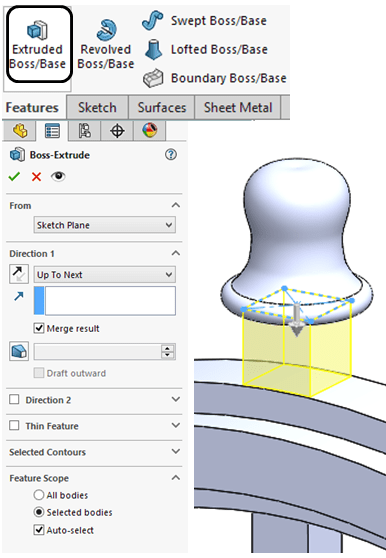
Extrude the previous sketch Up to Next (the Outter Wheel)
STEP 13.
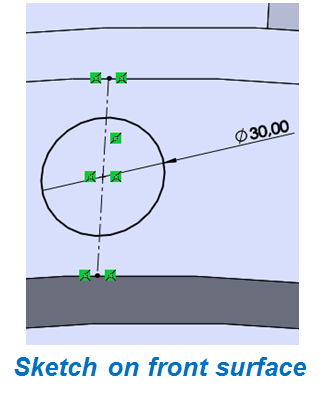
On front side of Outer Wheel on the upper side in the middle sketch a circle of 30mm
STEP 14.
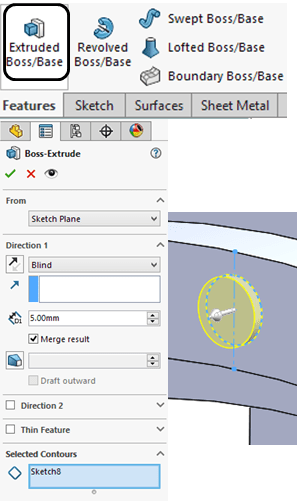
Extrude the previous sketch with 5mm outwards.
STEP 15.
In Features toolbar click on “Circular Pattern” icon , choose the wheel axis as Direction 1, put 8 instances and select the Handle+Spoke, the square bodies and the Circle Extrude form the front side, keep all the parameters as shown below and click OK.


The Wheel Design looks like this.
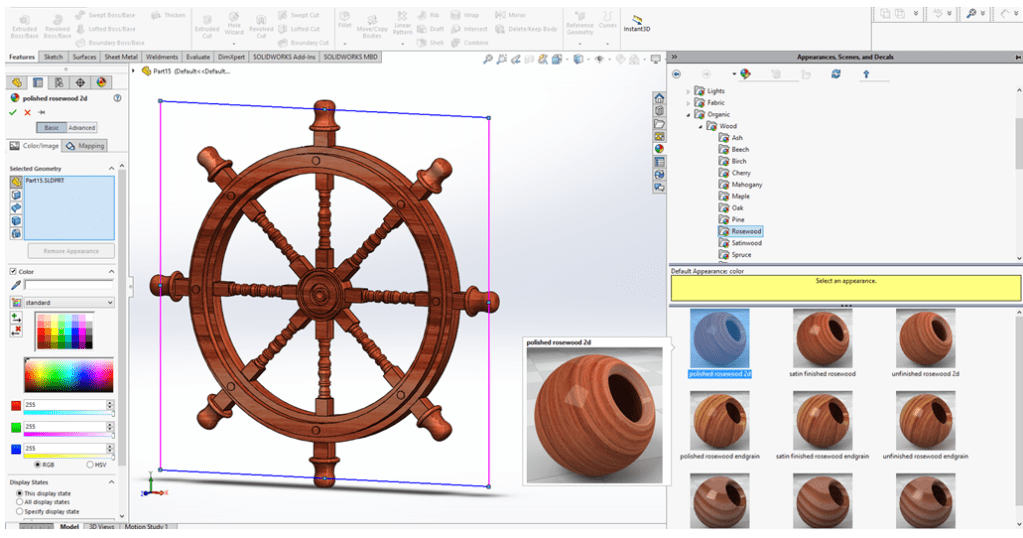
STEP 16.
To make the design more beautiful, apply different appearances on it. For instance choose for the enitre part the Appearance as Wood ->Rosenwood –>Polished RosenWood 2D
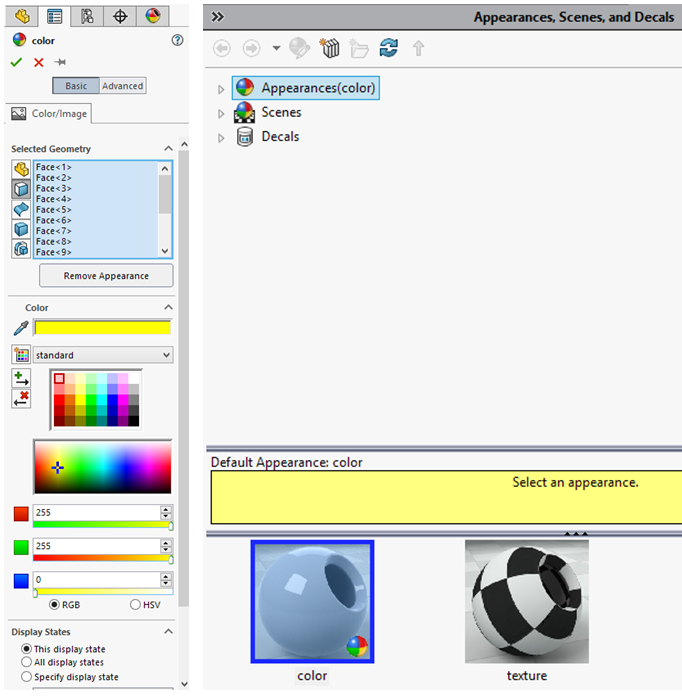
Put a simple color for instance yellow on the extruded circles on the front side

You can use Granite in green color as shown
And in similar way you can add other appearances as you like, and make the final product look something like this:

This work is also available as video version on my YouTube channel as embedded below:

Leave a comment