
An Assembly is a product made of single components joined to work together. Fixation elements are mandatory for every mechanical product to work as intended. So let’s design the specific components and at the end we’ll use the standard parts which are largelly available to download online.
THE FIXATION PIN
STEP 1.

Create a New part and rename it Fixation Pin.
STEP 2.
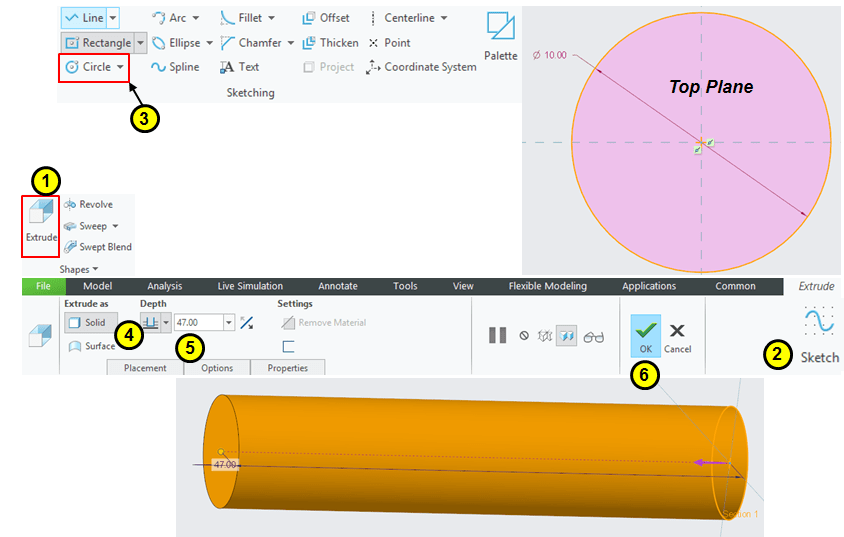
In Model Environment, click on Extrude icon and sketch a circle of Ø10mm on Top Plane then extrude it at 47mm.
STEP 3.
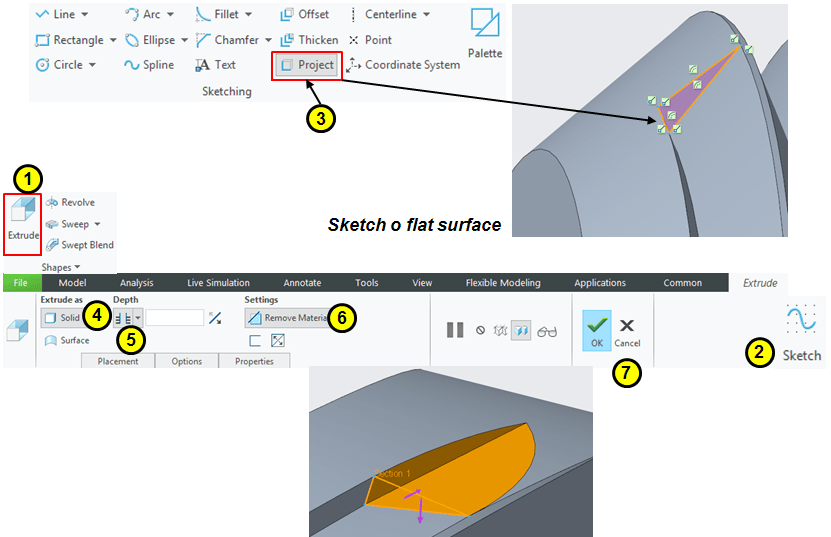
Click on Extrude icon and on a flat surface sketch a circle of Ø14mm and extrude it at 5mm.

STEP 4.
Add chamfers. In this case for example add only 1 Chamfer feature in model tree but which contains 2 different values 0.6mm x 45° for Set 1 and 1mm x 45° for Set 2.

STEP 5.
In Model Environment under Shapes ribbon click on the little black arrow near Sweep icon to expand the menu and choose Helical Sweep. Then create a helix as shown:

STEP 6.
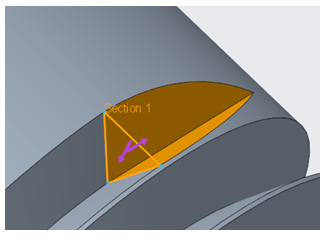
Tweak the start and the end of the thread as follows: on the flat cut project the edges and extrude the sketch through all in order to remove material.
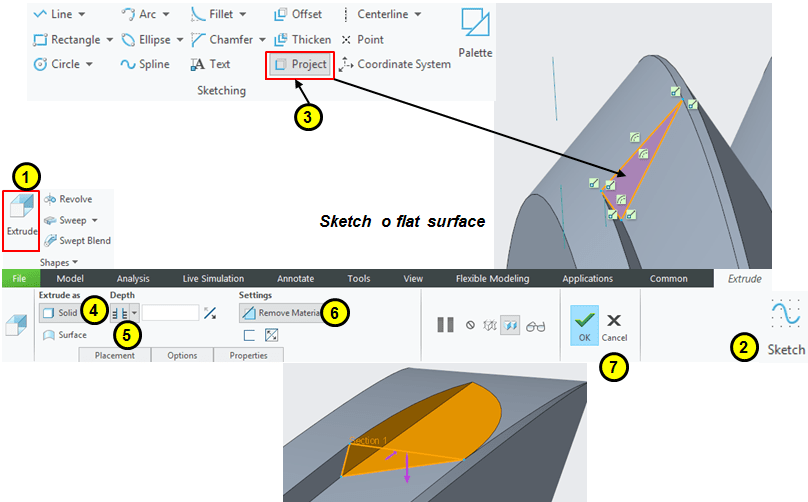
Do the same on the other side.
STEP 7.
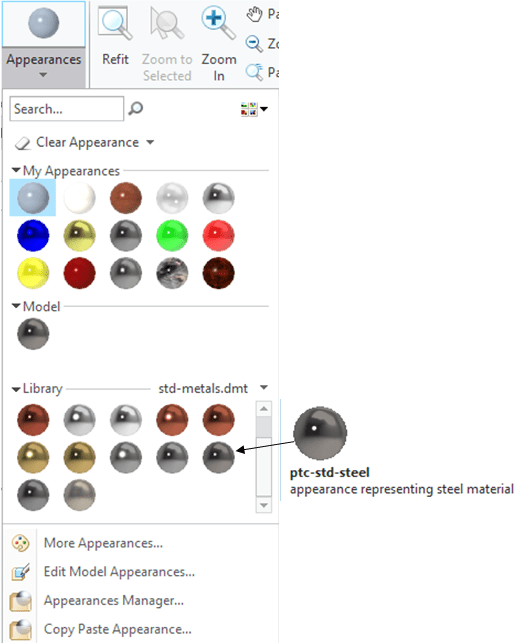
Add metalic appearance, such as steel
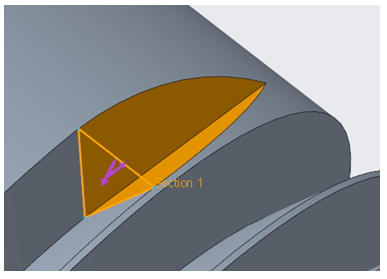
The final part looks like this:
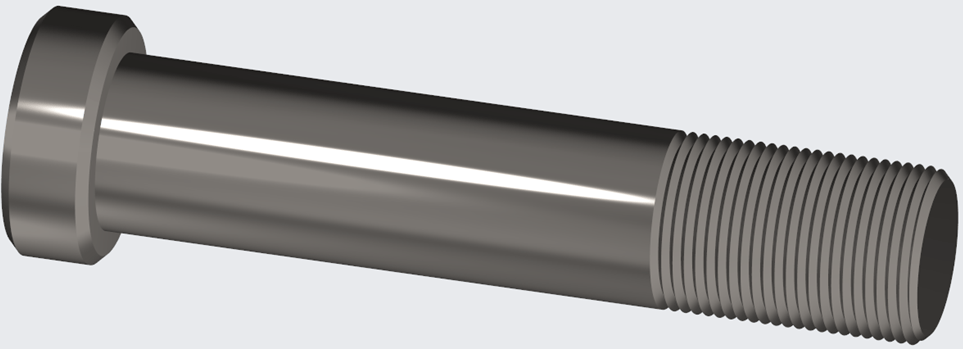
THE AXLE ROD
STEP 1.
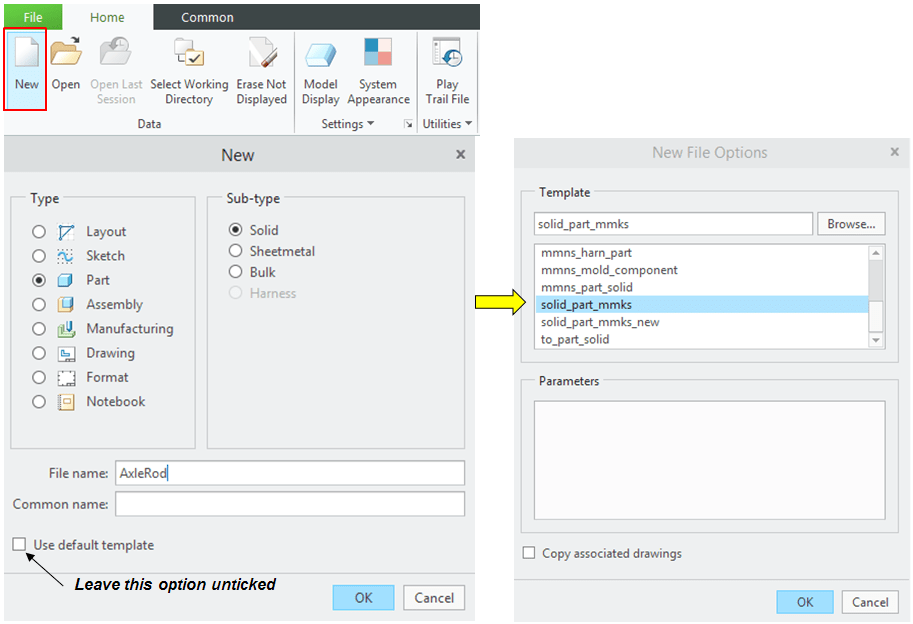
Create a New part and rename it Axle Rod.
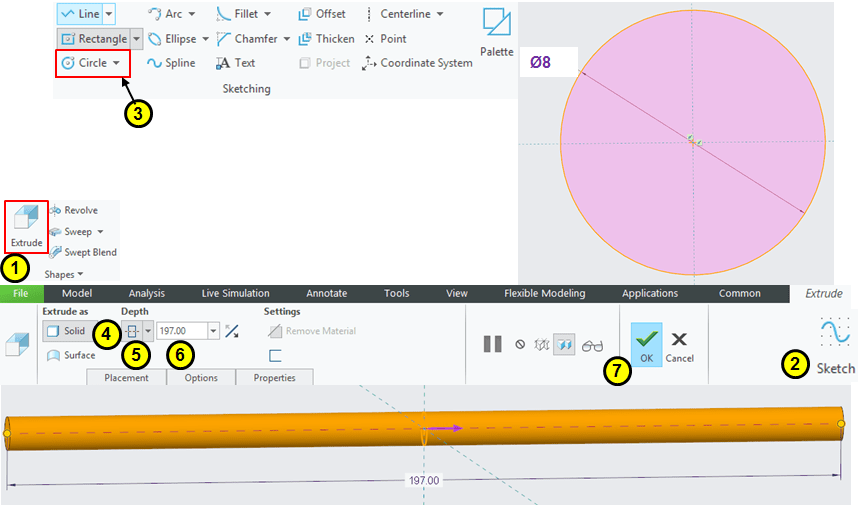
STEP 2.
Click on Extrude icon and on Front Plane sketch a circle of Ø8mm then extrude it by the mid-plane at 197mm.
STEP 3.
Apply chamfers at 1mm x 45°

STEP 4.
In Model Environment under Shapes ribbon click on the little black arrow near Sweep icon to expand the menu and choose Helical Sweep. Then create a helix as shown:
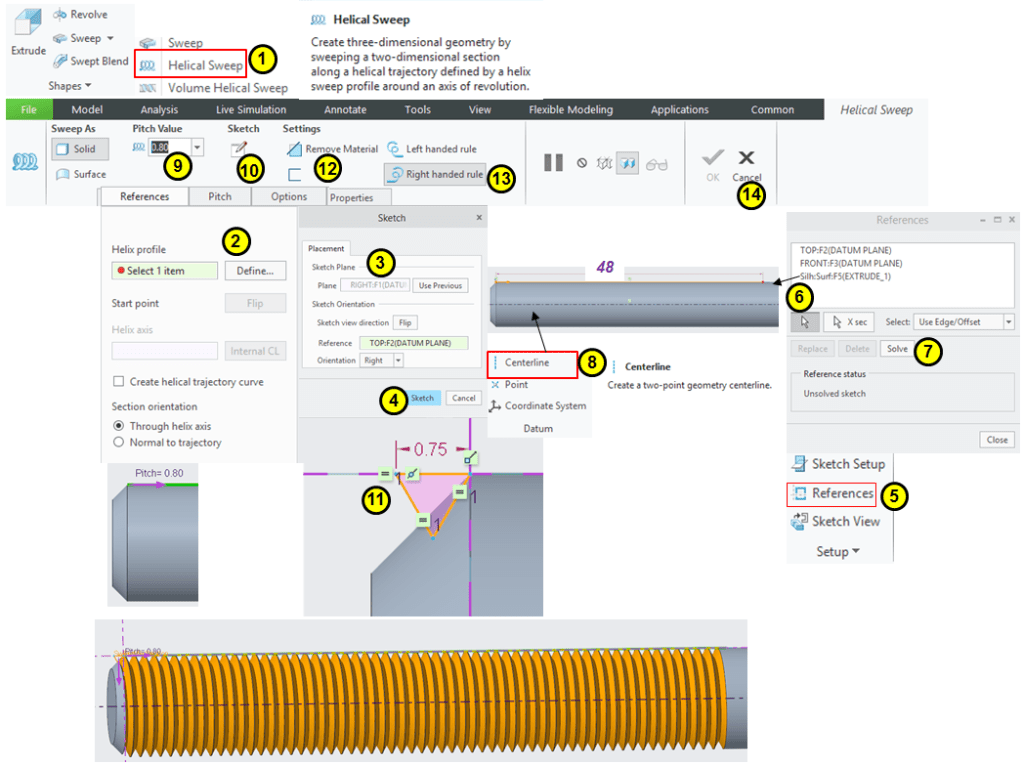
STEP 5.
Tweak the start and the end of the thread as follows: on the flat cut project the edges and extrude the sketch through all in order to remove material.
STEP 6.
Do the same on the other side.
STEP 7.
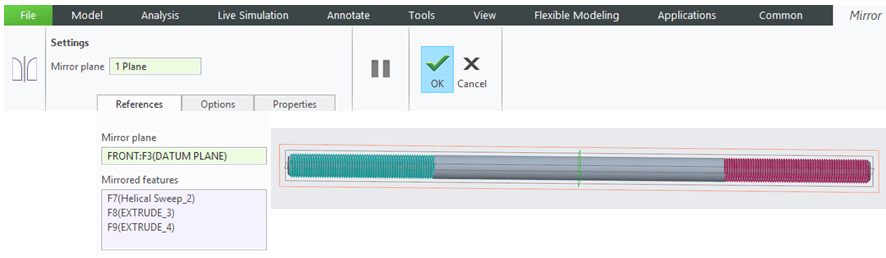
Select the helix and the 3 Extrude-cuts and mirror them vs. the mid-plane (Front Plane)
STEP 8.

Add metalic appearance, such as brushed steel.
The final part looks like this:

THE WASHER 1
STEP 1.

Create a New part and rename it Washer1.
STEP 2.
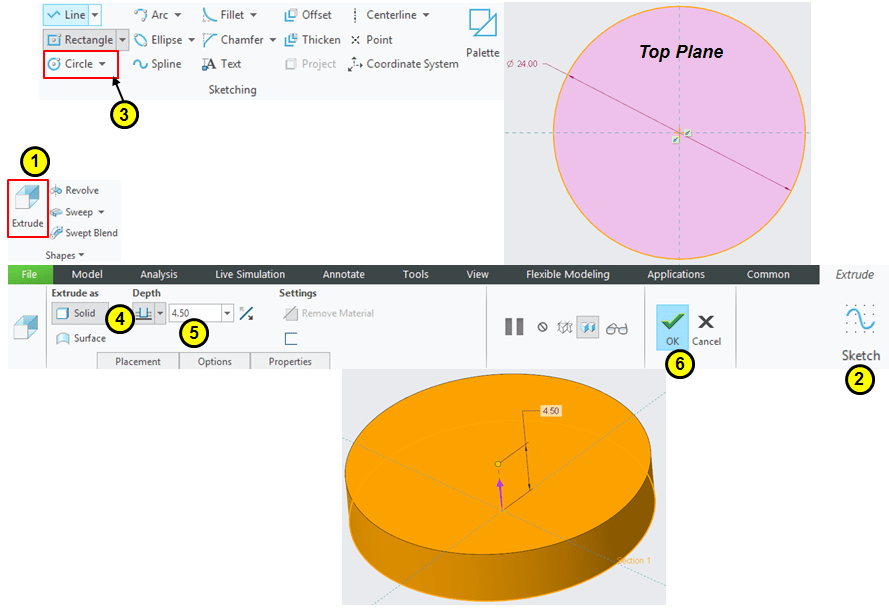
Click on Extrude icon and on Top Plane sketch a circle of Ø24mm then extrude it at 4.5mm.
STEP 3.
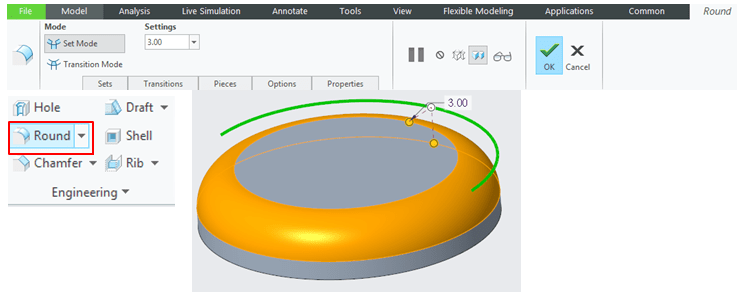
Apply a round of 3mm on one side
STEP 4.
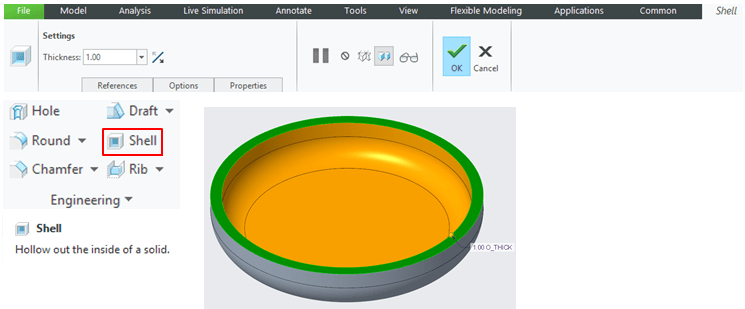
Shell the part at 1mm thickness.
STEP 5.
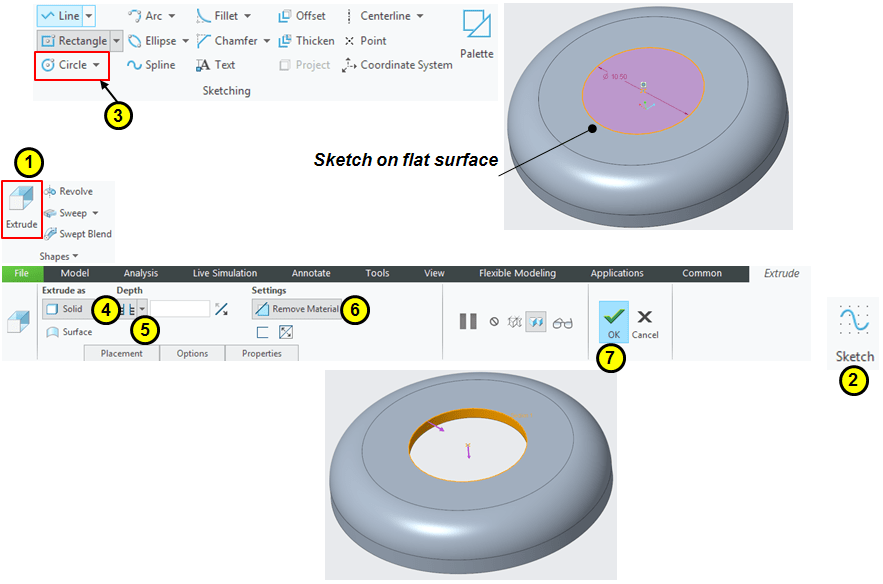
Click Extrude, then sketch a circle of Ø10.5mm and extrude it as a cut through all.
STEP 6.

Add metalic appearance, such as brushed steel.
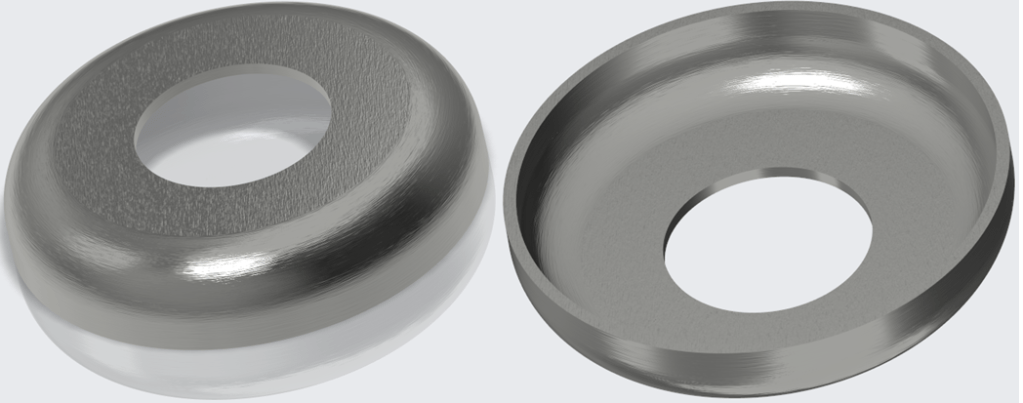
The final part looks like this:
THE WASHER 2
STEP 1
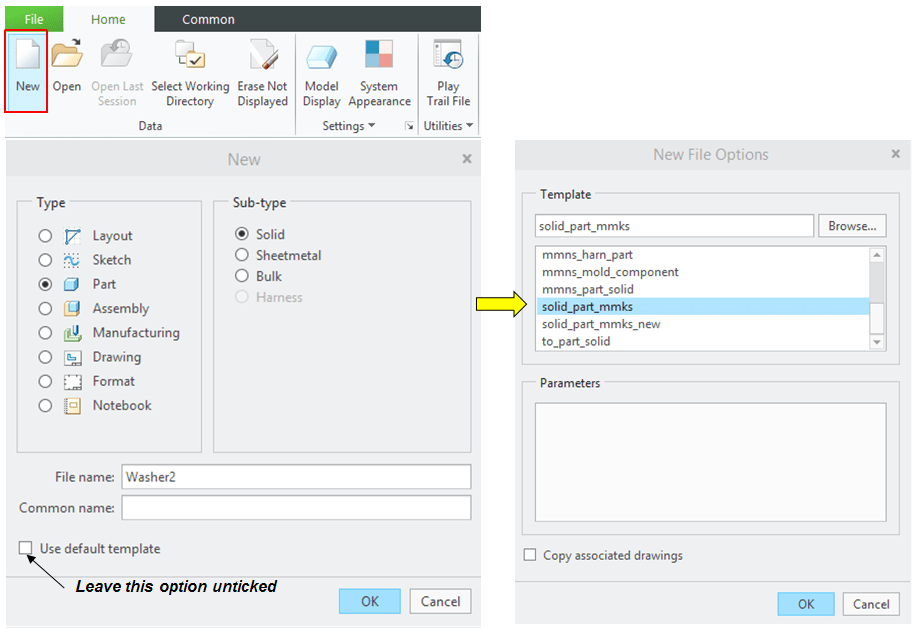
Create a New part and rename it Washer2.
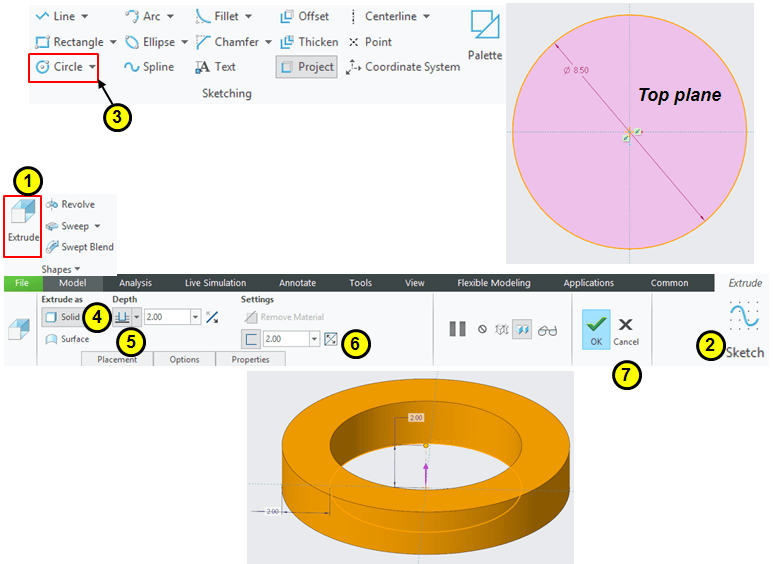
STEP 2.
Click on Extrude icon and on Top Plane sketch a circle of Ø8.5mm then extrude it at 2mm height as thicken sketch of 2mm outwards.
STEP 3.

Add metalic appearance, such as brushed steel.
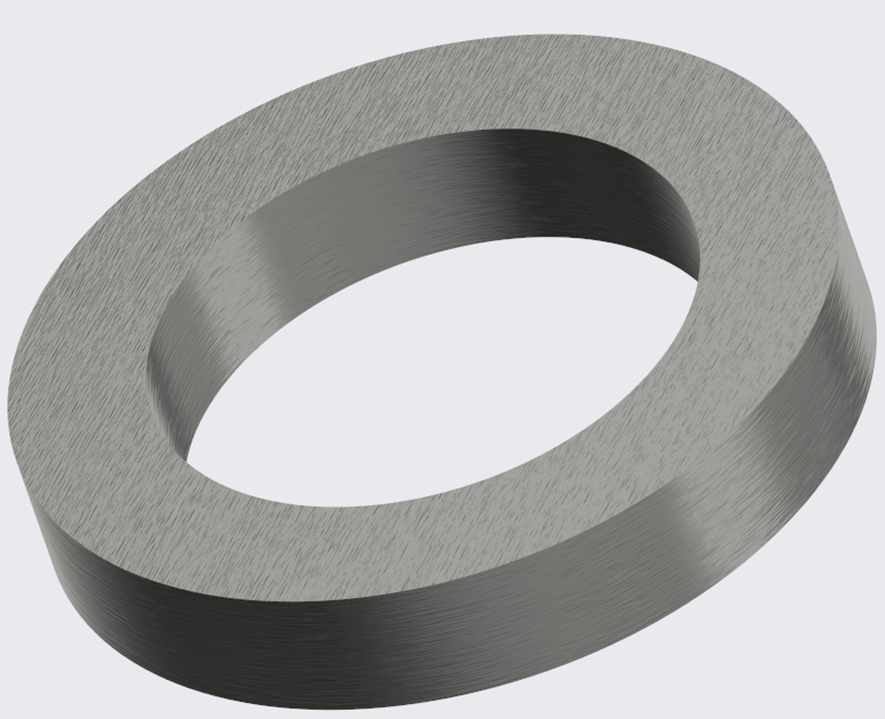
The final part looks like this:
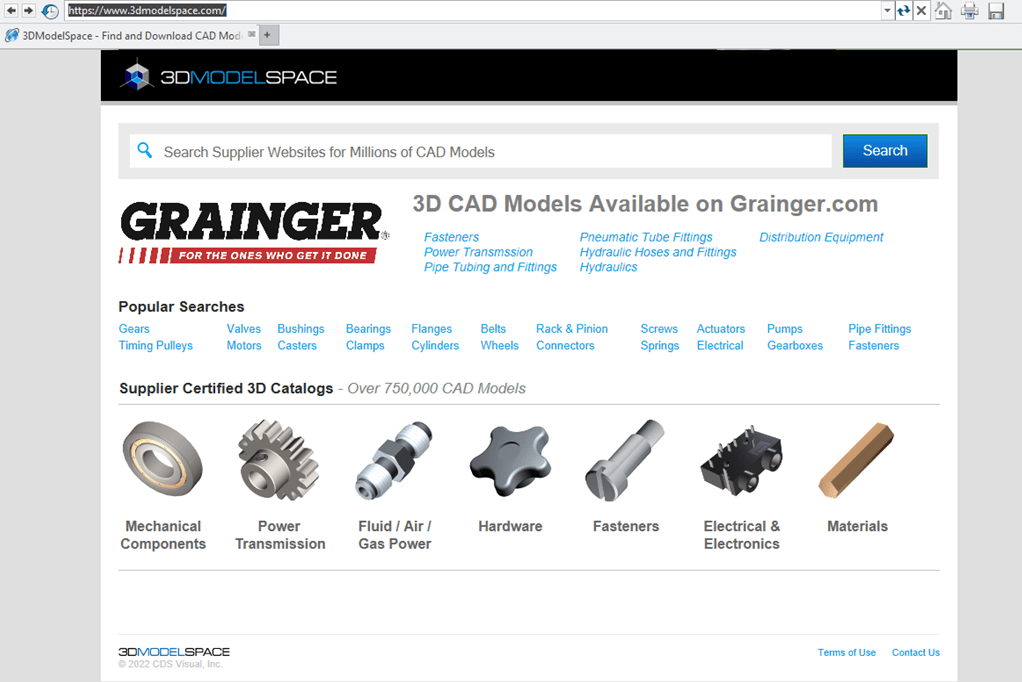
The rest of the components are standard. They are abundantly available online to download fom different sources. These parts are designed according to the international standards applicable both for imperial and metric system. Therefore you have a large range of sizes and forms to choose from. The parts are also available as CREO Parametric native files, therefore you can even edit and customize them according to your project need.
The website I use in for my Skateboard Product is called: 3DMODEL SPACE.
THE BALL BEARING
STEP 1.
Go to main page on 3DModel Space website –>Click on Mechanical Components–>Ball Bearings–>AST Bearings–>Miniature & Instrument Series, Stainless Steel – Inch and Metric–>Metric Series–>Narrow the results as follows and download the part 608HZZ:
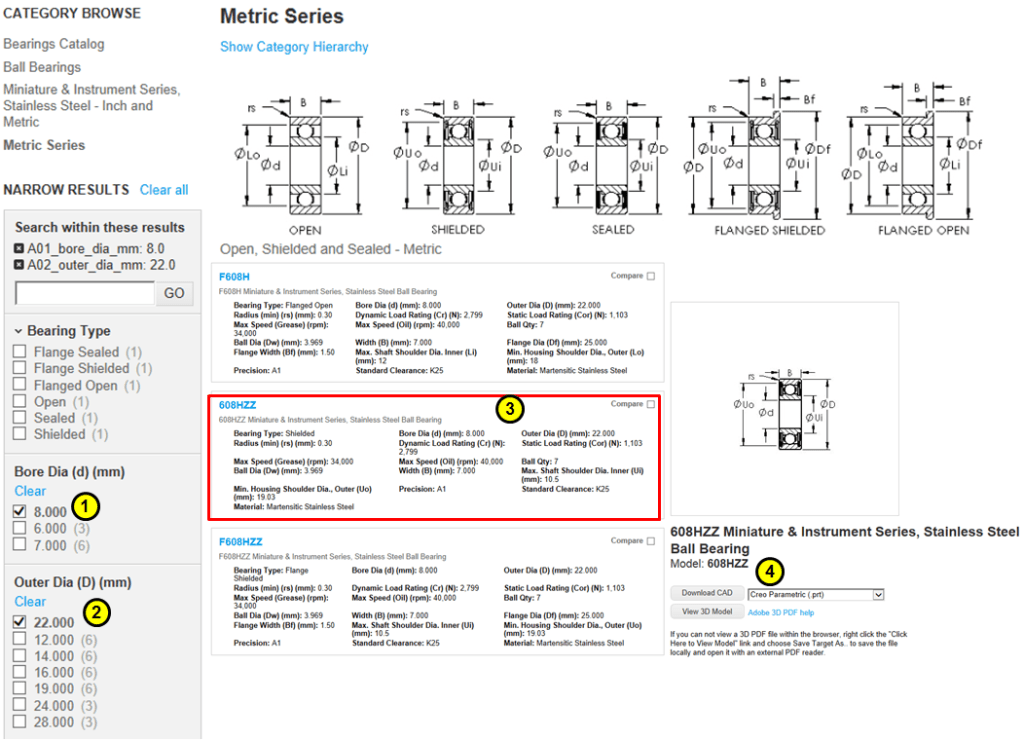
STEP 2.
Unzip the downloaded data in your project folder and open the part in CREO Parametric, then apply CREO appearances as follows:
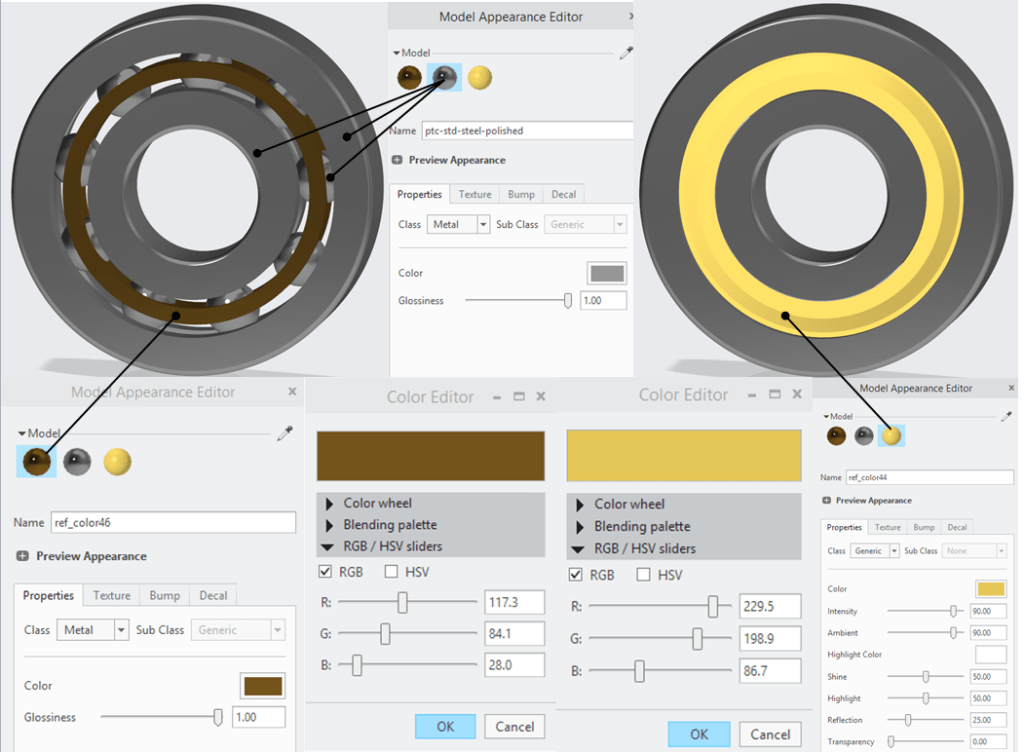
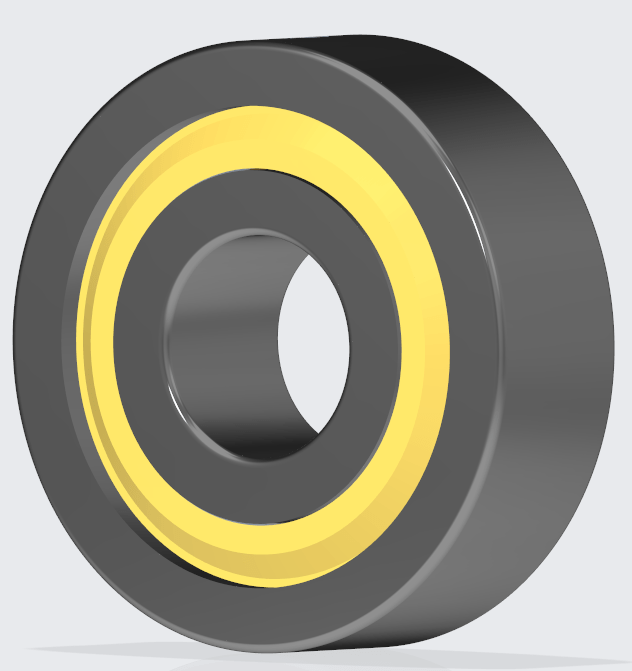
Ball Bearing 608HZZ
THE FIXATION SCREW
STEP 1.
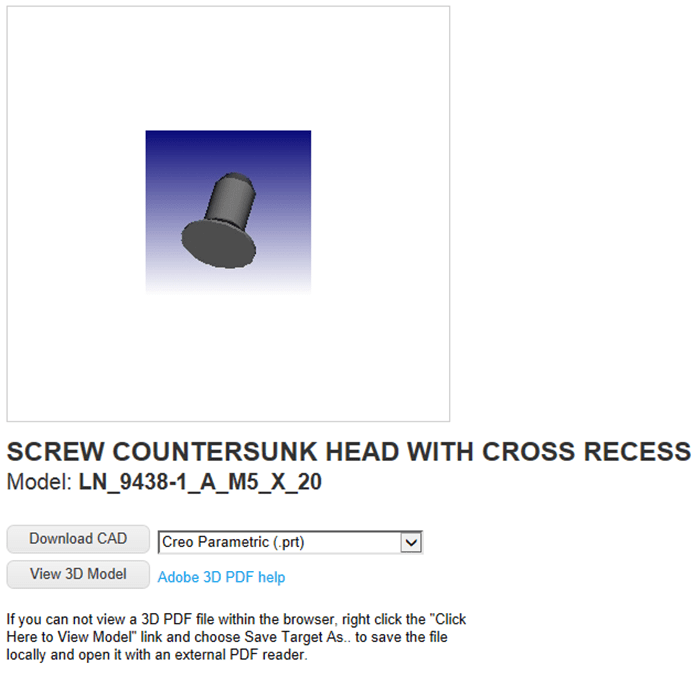
Go to main page on 3DModel Space website –>Click on Mechanical Components–>Fastners–>Standards Library–>DIN Library–>Screws–>COUNTERSUNK HEAD SCREWS–>SCREW COUNTERSUNK HEAD WITH CROSS RECESS–> Scroll down the list and pick LN_9438-1_A_M5_X_20 and download the zip file.
STEP 2.
Unzip the file in your project folder and open the part in CREO. Then tweak the part as follows:
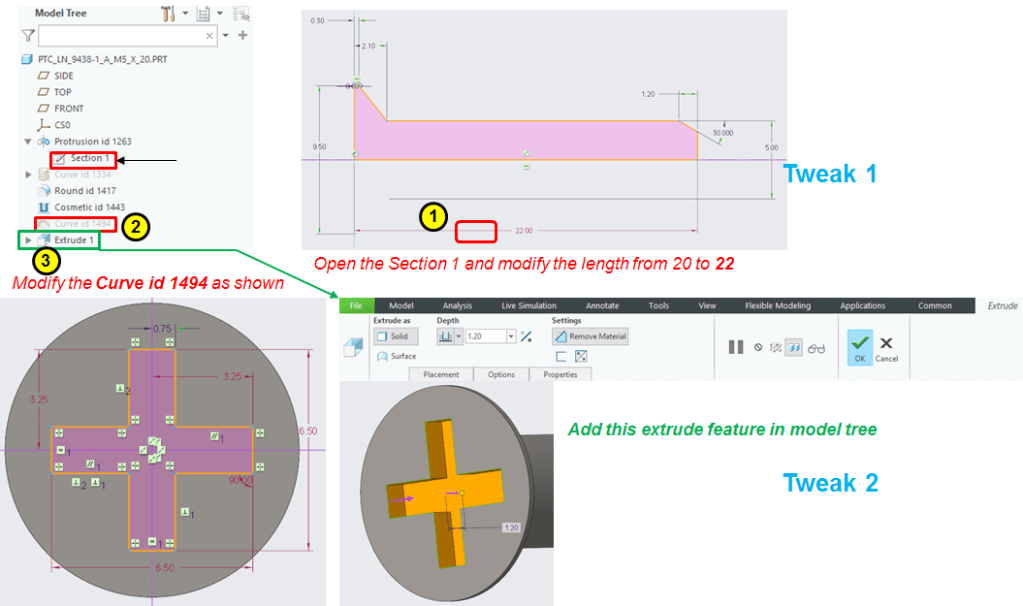
STEP 3.
Apply steel appearance in CREO and the final part looks like this:

Screw Countersunk head with Cross Recess / LN_9438-1_A_M5_X_20
THE NUT 1
STEP 1.
Go to main page on 3DModel Space website –>Click on Mechanical Components–>Fastners–>Standards Library–>DIN Library–> Nuts–>HEXAGON NUTS–>HEXAGON NUTS WITHOUT WASHER FACE–>HEXAGON NUT WITH SMALL WIDTHS ACROSS FLATS from the list pick DIN_70615-1-M10 and download the zip file.
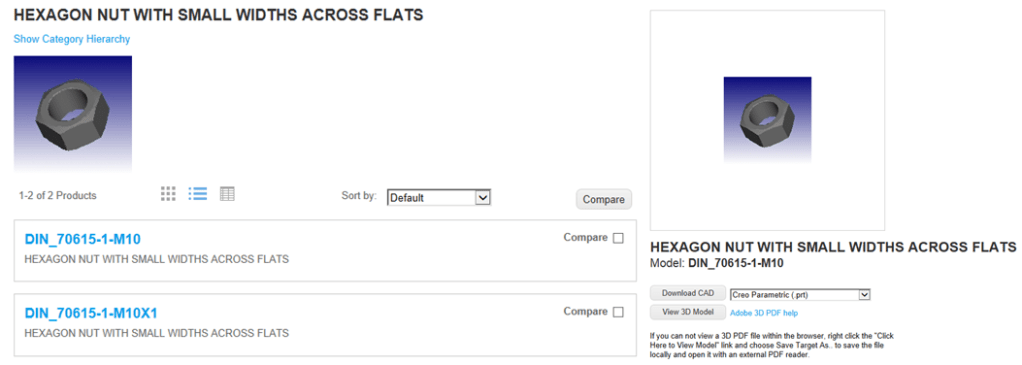
STEP 2.
Unzip the file in your project folder, open the part in CREO and Apply steel appearance. The final part looks like this:
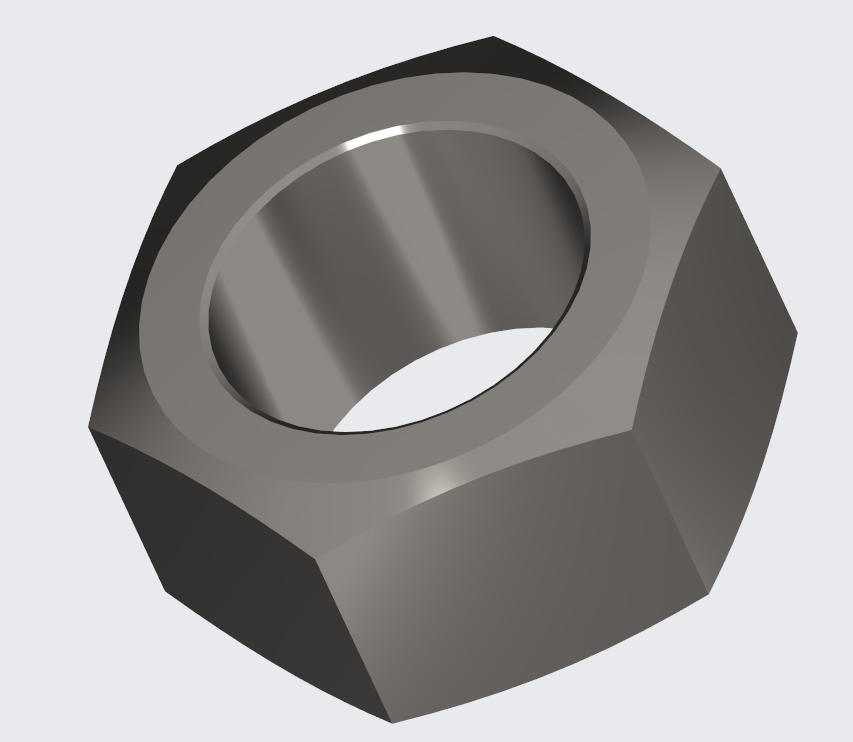
Hexagon Nut with small widths across flats- DIN_70615-1-M10.
THE NUT 2
STEP 1.
Go to main page on 3DModel Space website –>Click on Mechanical Components–>Fastners–>Standards Library–>DIN Library–>Nuts–>SELF-LOCKING NUTS–>SELF-LOCKING HEXAGON NUTS–>HEXAGON NUTS SELF-ALIGNING SELF-LOCKING–> Pick the part LN_29795-1_05 and download the zip file.
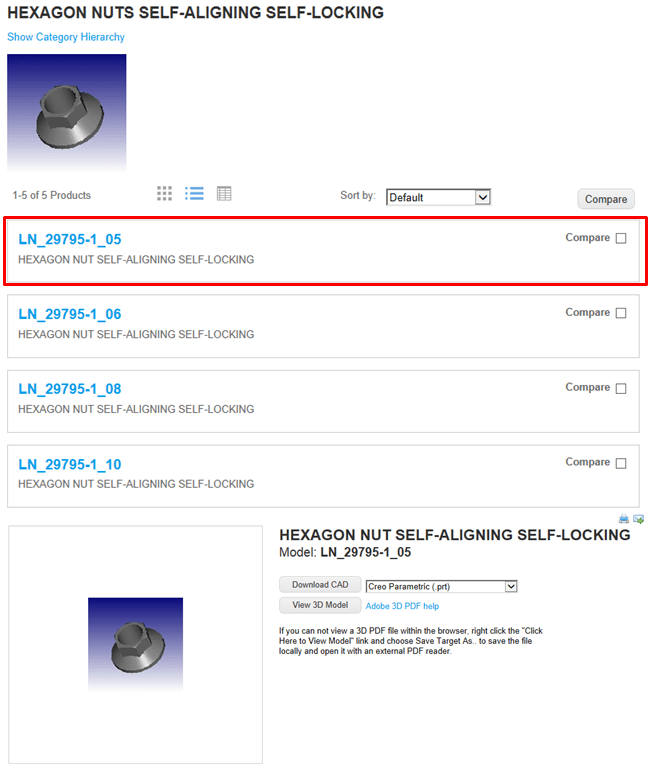
STEP 2.
Unzip the file in your project folder, open the part in CREO and apply steel appearance. The final part looks like this:
Hexagon Nut self-aligning self-locking- LN_29795-1_05
THE NUT 3
STEP 1.
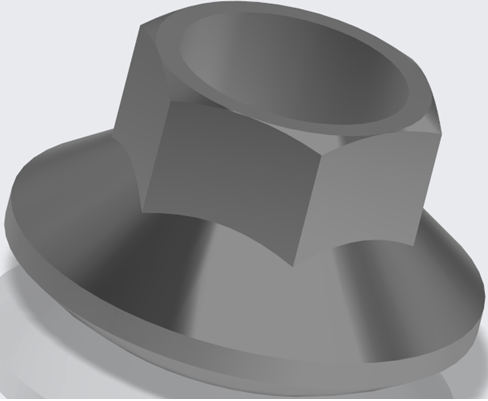
Go to main page on 3DModel Space website –>Click on Mechanical Components–>Fastners–>Standards Library–>DIN Library–>Nuts–>SELF-LOCKING NUTS–>SELF-LOCKING HEXAGON NUTS–>HEXAGON NUTS SELF-ALIGNING SELF-LOCKING–> Pick the part LN_29795-1_08 and download the zip file.
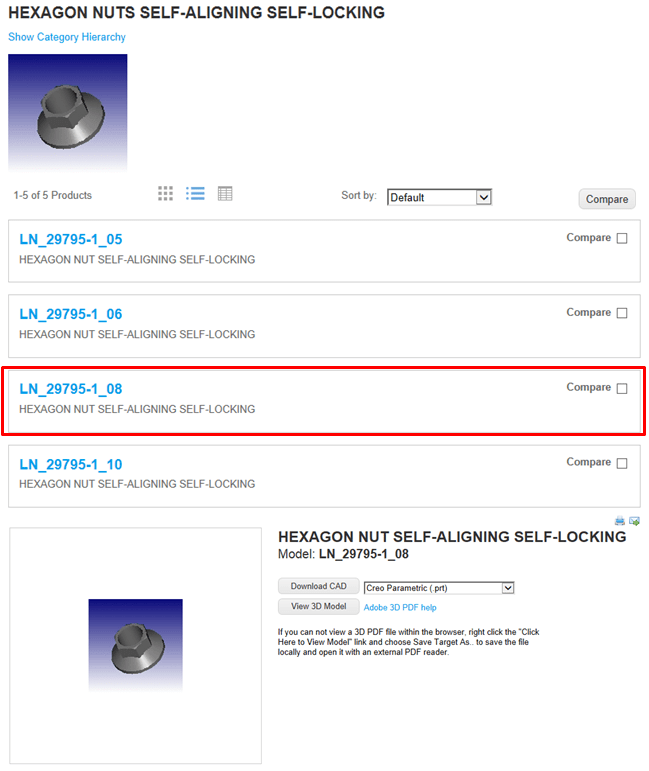
STEP 2.
Unzip the file in your project folder, open the part in CREO and apply steel appearance. The final part looks like this:

Hexagon Nut self-aligning self-locking- LN_29795-1_08
This design work is also available as video version on my YouTube channel as embedded below:

After checking out a handful of the blog posts on your website, I really like your way of writing a blog. I added it to my bookmark website list and will be checking back in the near future. Please visit my web site too and let me know your opinion.
LikeLike