Let’s continue with Katana Sword design. Handle design is done as follows:
TSUKA – HANDLE
STEP 1.
The design work must continue in the same Top-down approach, like we did in Part 2. This means that the new parts are created directly in the Ansembly file using the original reference system form Blade part. Therefore all new parts are related to Blade position. Because this is a traditional Japanese product l like to use the japanese names for each new component but of course if that’s not easy for you to remeber, sure feel free to use the equivalent english names. So let’s start.
Open the Assembly as saved in previous session (Part 2) –>in components ribbon click on Create icon and create the new part named TSUKA_Handle.
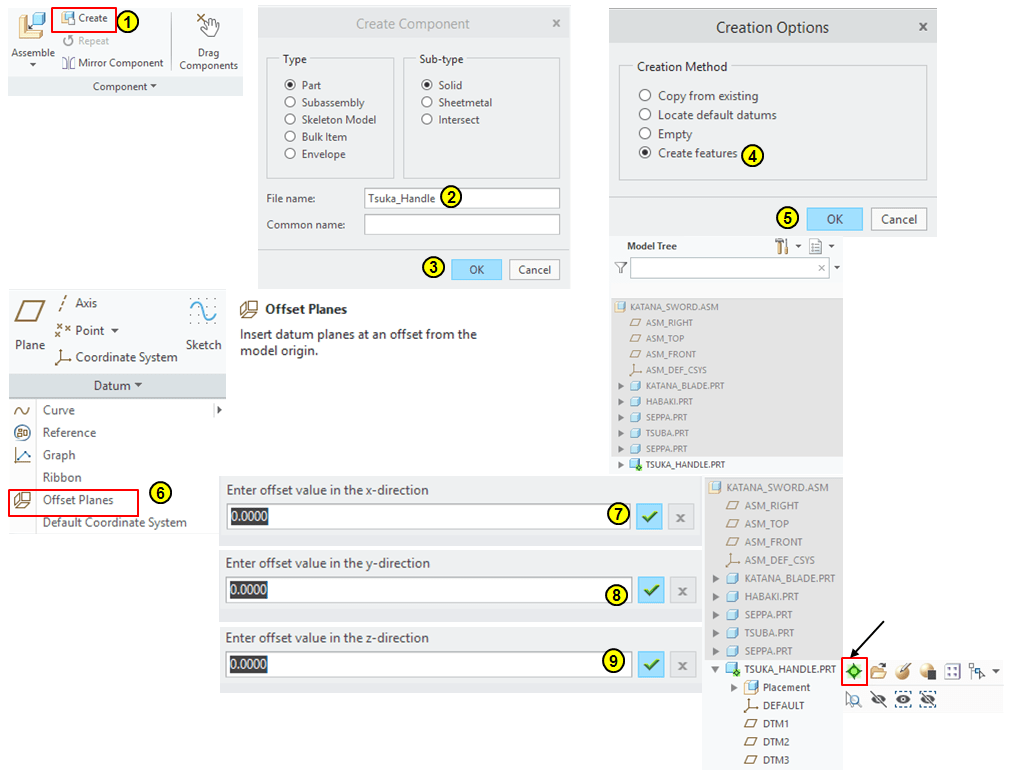
Before to add features make sure the new part is active (a little green star must be activated on the part name in Model tree). If it’s not, click on the part name and from the pop-up menu click on the green star to activate the part.
STEP 2.
As already mentioned, in the Top-Down desing everything is related to the position of the existing assembly. In this case the last part created was th spacer called Seppa. Therefore, in order to continue we need to use its surfaces.
Click on Extrude icon and pick the flat surface for Seppa part, sketch an elipse of 24x39mm and extrude it as shown:
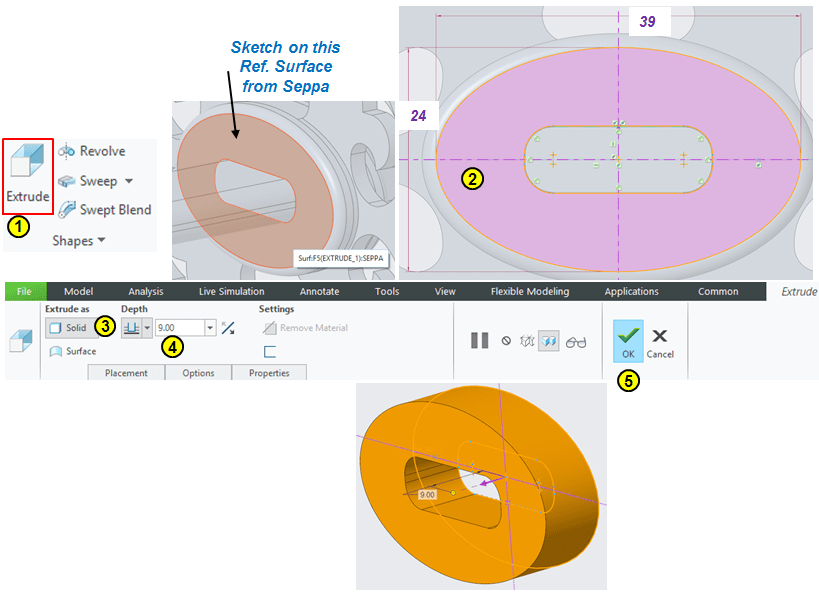
STEP 3.
Use the surface from the previous feature to create the second extrude by offsetting the outer edge inside the sketch with 1.5mm. Then extrude it until the last surface of Blade on handle side, as shown:
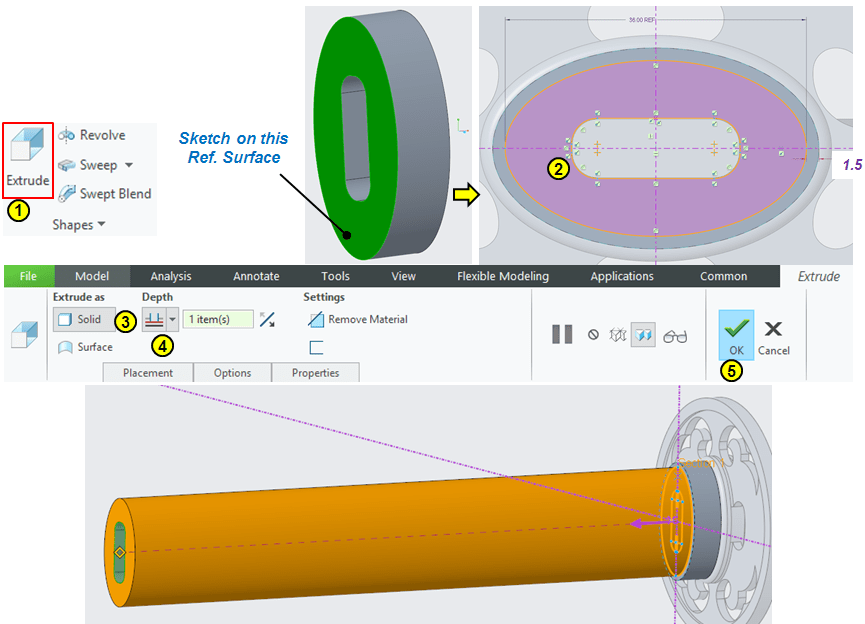
STEP 4.
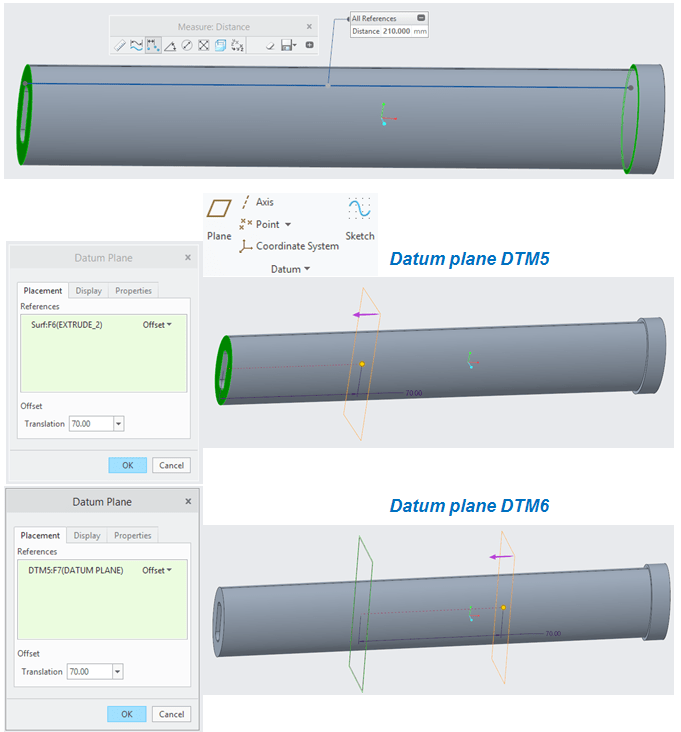
With a quick lenght measurement you’ll see that the lentgh of gripping area on the handle is 210mm. So, before to create the shape of the handle you need to create 2 additional datum planes at 70mm offset from each other as follows:
STEP 5.
Using the 1st and the last flat surfaces and the 2 additional Datum planes create an sketch on each by drawing elipses and divide them in 4 quarters by datum points, as shown:

STEP 6.
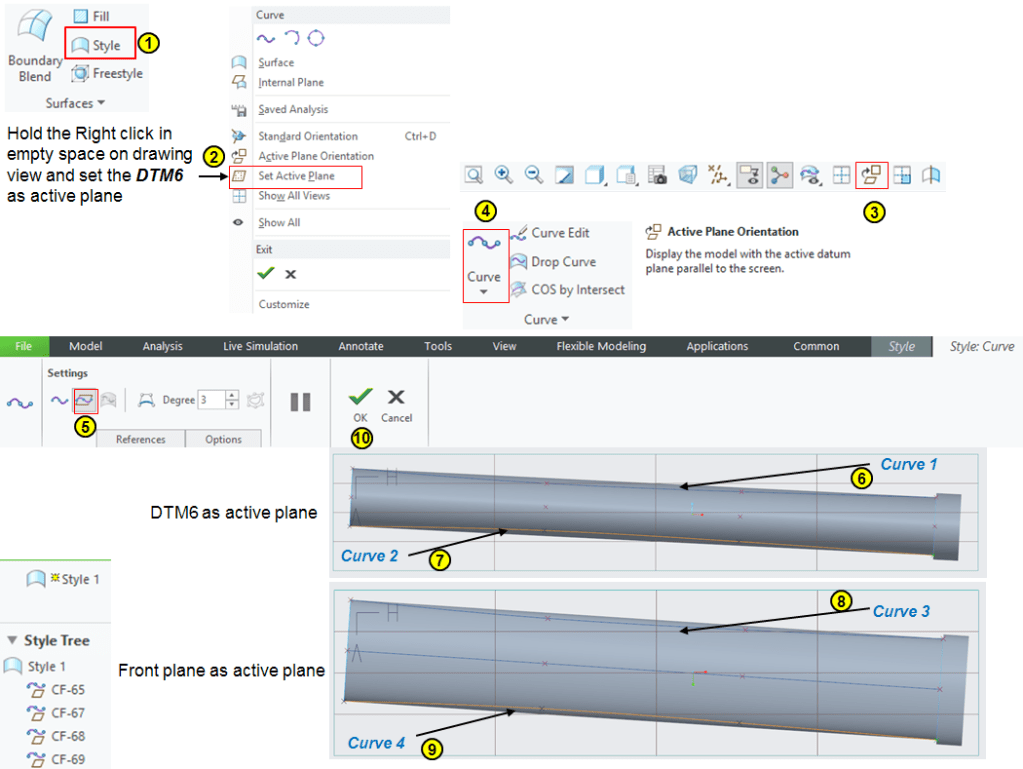
Create another datum plane (DTM6) using 3 of the datum points previously created, as shown:

STEP 7.
Activate the Style workbench and create 4 planar curves (2 on DTM6 + 2 on Front plane), as shown:
STEP 8.
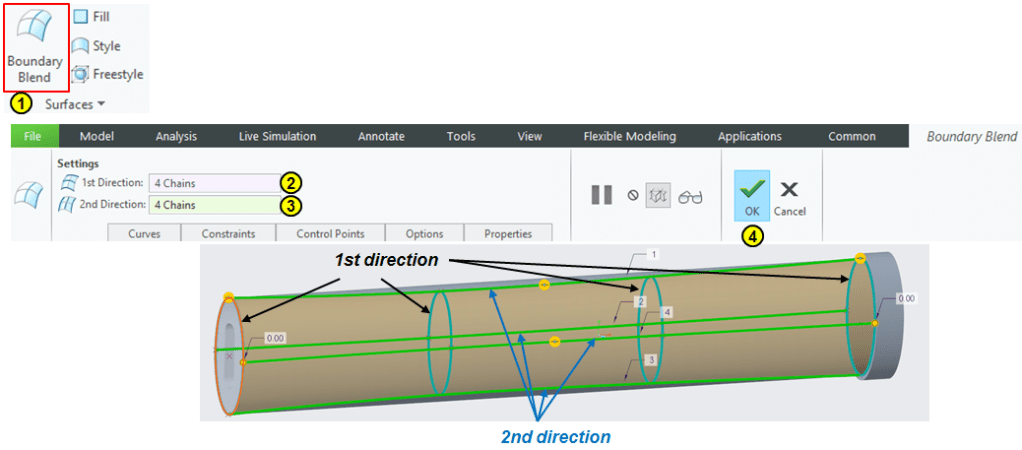
Back in Model Workbench, click on Boundary Blend icon and choose the 4 sketches created at STEP 5 as section chains for the 1st direction and the 4 curves created at STEP 7 as chains for the trajectiries for the 2nd direction. As shown:
STEP 9.
Keep the previously created quillt selected and click on Solidify icon in Editing ribbon–> make sure the purple arrow is pointed inwards and click OK.

STEP 10.
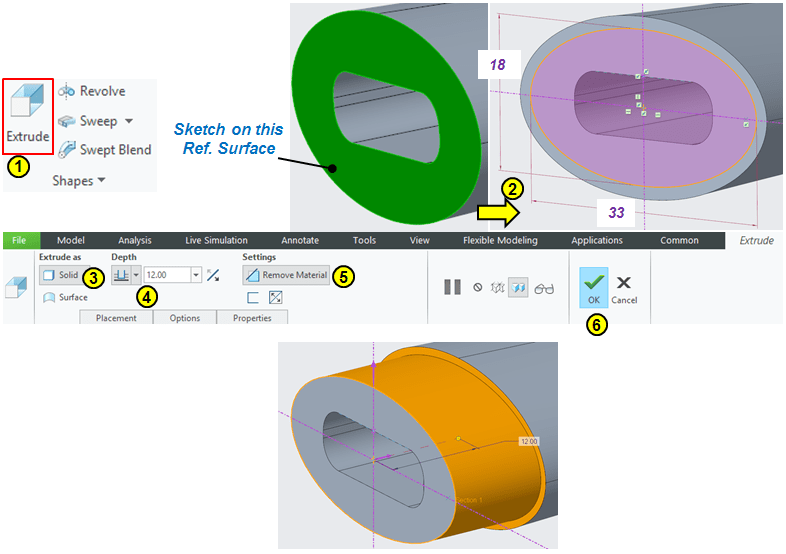
Use the last flat surface of the handle as reference and click on Extrude icon–> draw and elipse of 18x33mm then extrude it 12mm inwards as shown:
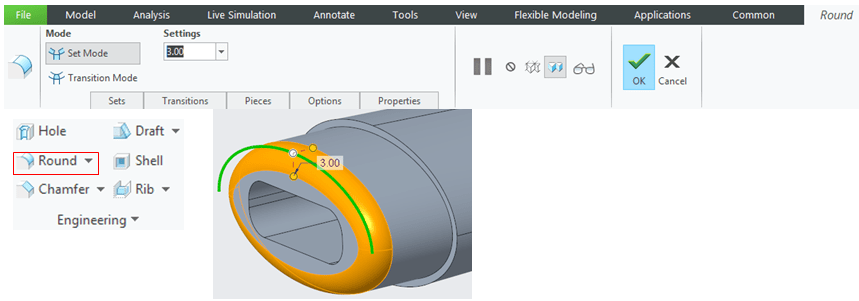
STEP 11.
Apply a Round of 3mm on outer edge.
STEP 12.
Add the following appearances:
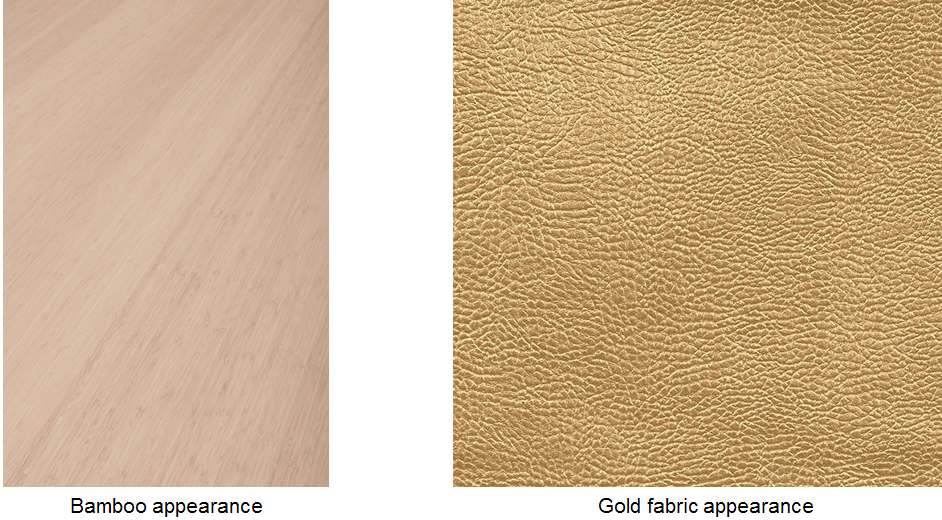
… And the final part is ready. Click the Save icon and save it in the same project folder with the other Sword components.

TSUKA-ITO _ HANDLE WRAPPING
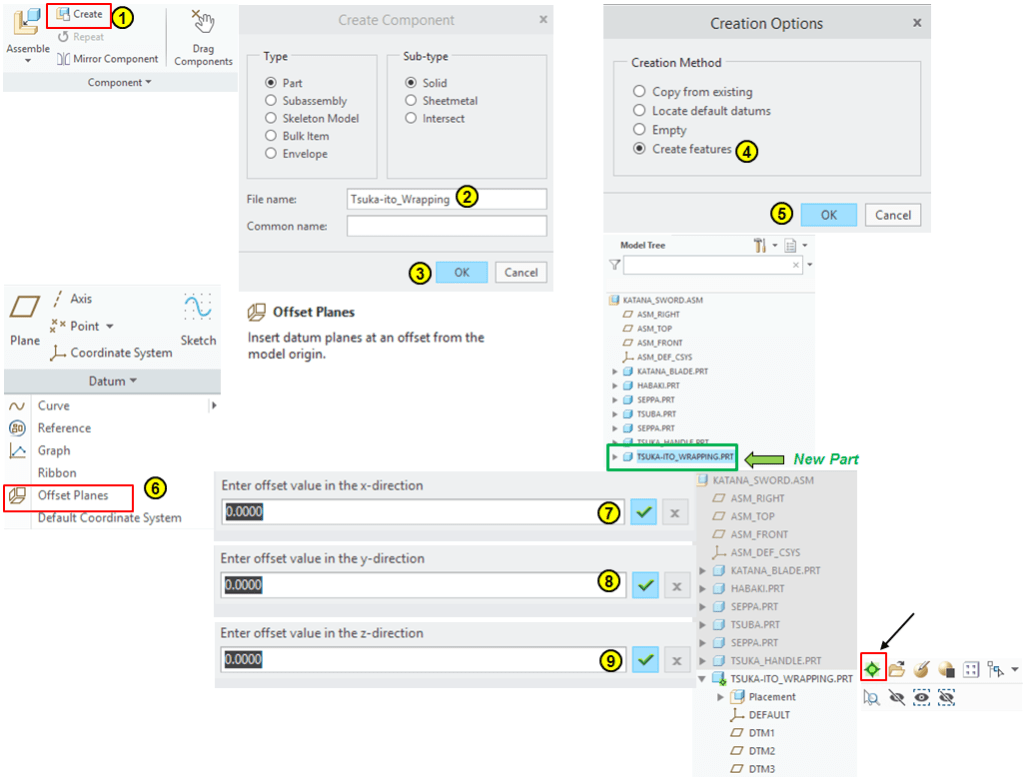
STEP 1.
Create a new part as already shown:
STEP 2.
This parts is done in similar way like the previous Handle body. Starting from the flat surface of the handle body create 2 additional datum planes at 70mm offset from each other as shown:

STEP 3.
On the 1st, the last and the 2 additional datum planes, project the elipses from the handle body and divide them in 4 segments by new datum points, as shown:

STEP 4.
Create a datum plane using 3 of the datum points as shown:

STEP 5.
Activate the Style workbench and create 4 planar curves (2 on DTM6 + 2 on Front plane), as shown:

STEP 6.
Back in Model Workbench, click on Boundary Blend icon and choose the 4 sketches created at STEP 3 as section chains for the 1st direction and the 4 curves created at STEP 5 as chains for the trajectiries for the 2nd direction. As shown:

STEP 7.
Keep the previously created quillt selected and click on Thicken icon in Editing ribbon–> make sure the purple arrow is pointed outwards and click OK.

STEP 8.
Click on Extrude icon–> sketch the cut-out profile on Front plane and extrude it at 30mm by mid-plane as shown: (pay close attention how you choose references in the sketch workbench, just in case, for more clarity watch the video at end of this design session).

STEP 9.
Add 0.5 chamfers on cut-out edges, as show:

STEP 10

In model tree select the last 2 features and from the pop-up menu click on Group icon to put these 2 features together in a Local Group
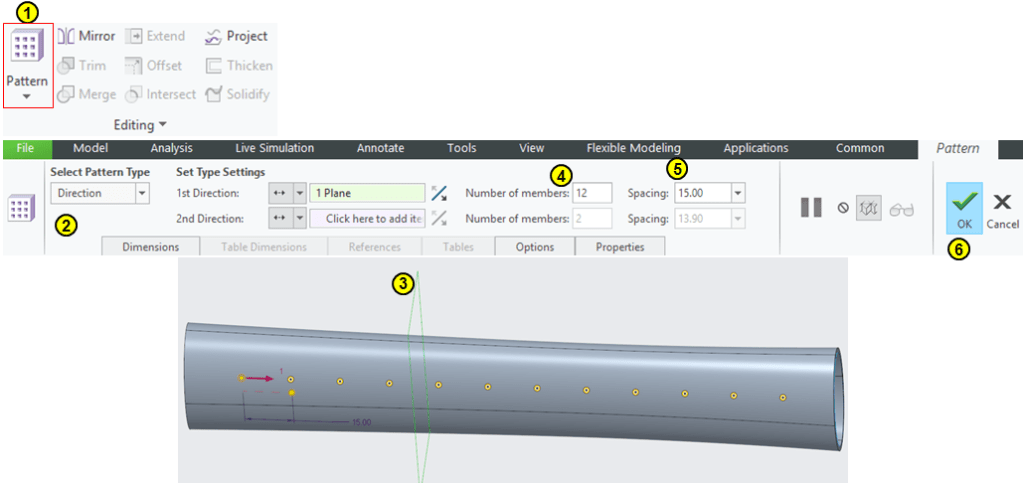
STEP 11.
Pattern the Local Group allong the direction of DTM 4 or DTM 5. Make 12 members at 15mm spacing.
STEP 12.
Add black cotton appearance:
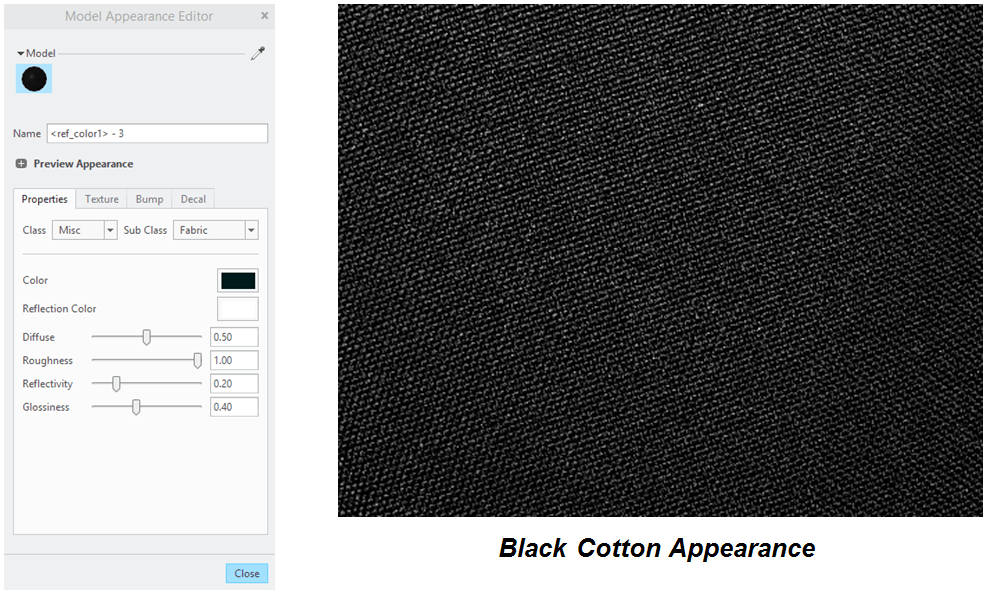
…and the Wrapping part is ready.

FUCHI _ METALIC COLLAR
STEP 1.
Create a new part named Fuchi.

STEP 2.
Use the side flat surface from Handle body as first reference—> click on Extrude icon and in sketch workbench , project the outer edges from Handle–> then extrude it as 1.5mm thick feature at 14mm inwards, as shown.

STEP 3.
Add 1 round and 1 chamfer on side outer edges.

STEP 4.

Add appearance save it and the part is ready.
KASHIRA_METALLIC POMMEL
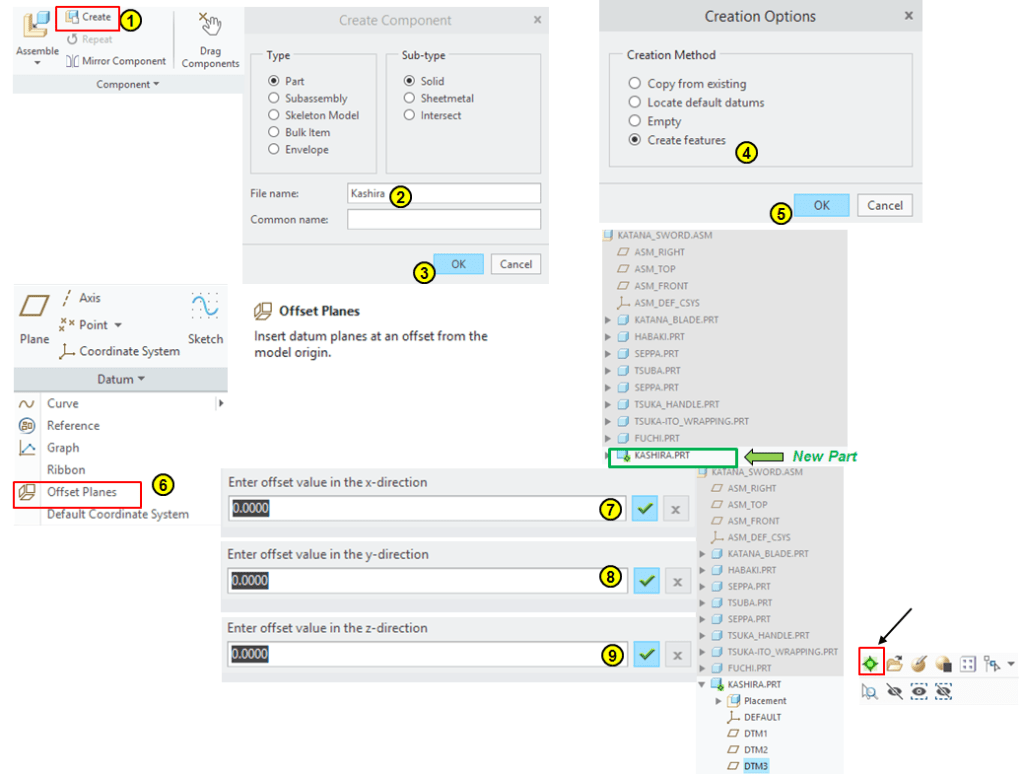
STEP 1.
Create new part named Kashira.
STEP 2.
Using the flat surface from the Handle body (Tsuka) click on Extrude icon and draw an elipse of 24.50×39.50mm. Then extrude is in 2 directions as shown:

STEP 3.
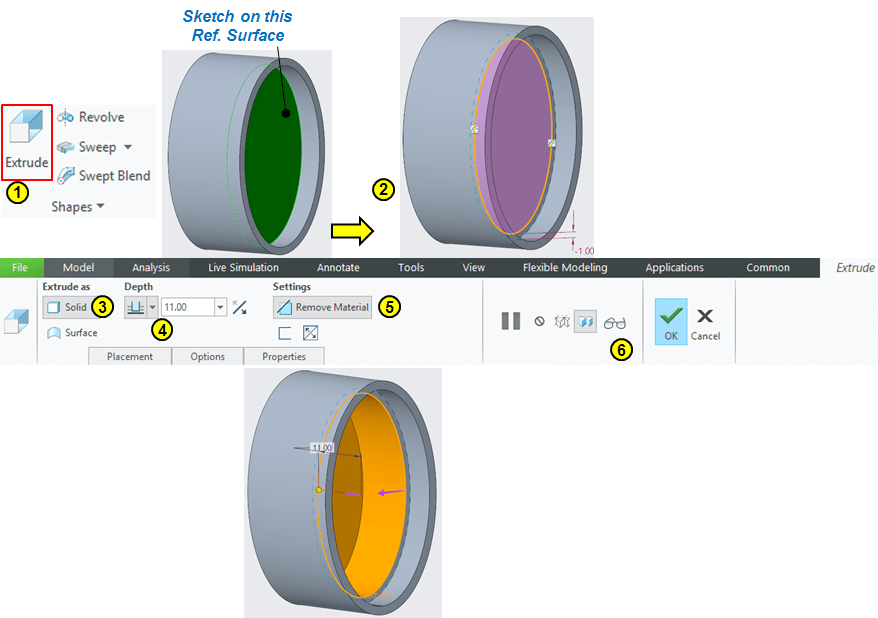
Using the side flat surface as reference, click on Extrude icon and in sketch workbench make and offset of 1.5mm inwards from the outer edge. Then extrude it 5mm in depth as shown:

STEP 4.
Using the bottom surface from the previous feature as reference, click on Extrude icon and in sketch workbench make and offset of 1mm inwards from the inner edge. Then extrude it 11mm in depth as shown:
STEP 5.
Add rounds as shown:

STEP 6.
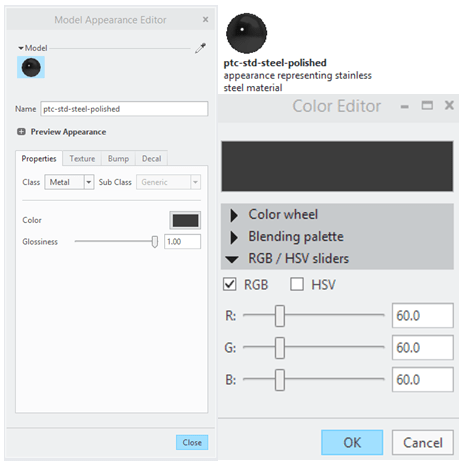
Add apprearance…

… and the part is ready.
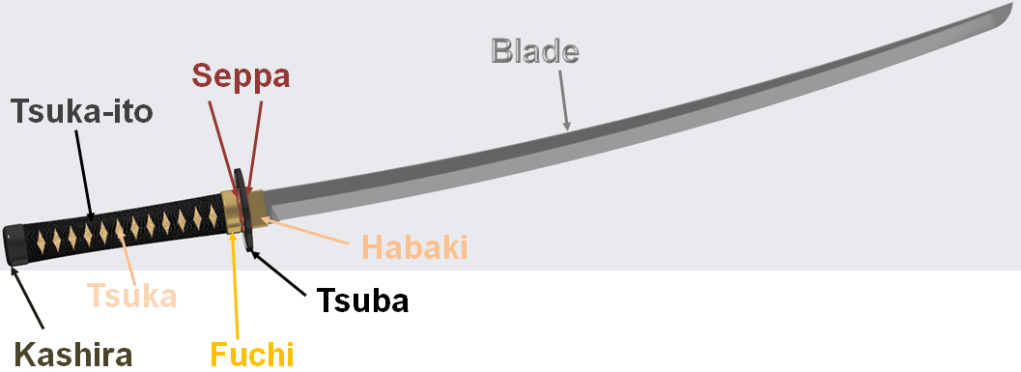
KATANA SWORD Product
At this stage the Katana Sword is complete and is made of the following parts:

This design work is also available as video version on my YouTube channel as embedded below:

Leave a comment